

Elden Ring is From Software’s latest offering in a line of dark fantasy action-RPG fare that has been continually refined and reinvented since Demon’s Souls landed on the PS3 back in 2009. While previous worlds have been immersive and captivating to explore, Elden Ring represents a grandiose shift.
From Software brings everything it’s achieved in the last decade of releases into this singular, massive entity that brings the best bits of its previous creations into a vibrant open world. As always, From Software’s honed duality of challenge and triumph go hand in hand, and players will find themselves continually tested against brutal opponents and unforgiving environments. With perseverance, any opponent can be felled. However, with the vastness of a gigantic, multi-biome universe to explore, players can enjoy an experience where they won’t ever feel that taking on the next titanic enemy is the only course of action at any given time. There are always new secrets to discover and abilities to find.
In addition, From Software has added conveniences that don’t interfere with its signature style but take away some frustrations, like adding respawn locations near bosses to help get right back into the battle after death instead of running back under harassment. To me, these games have never been about the perceived difficulty. Instead, they are about the sense of unparalleled adventure through atmospheric environments and the rush of victory that comes with overcoming the impossible.
Join me on a journey that spans close to 10 hours of gameplay, taking me into Limgrave, Stormveil, and the exciting areas beyond. In this adventure, I battle a major boss, learn how traveling the open world makes this unlike any other From Software experience to date, and even get a bit of color from game director Hidetaka Miyazaki himself. Did you know that there are other rather large dungeons mixed in with the gargantuan legacy dungeons and mini caves, coves, and catacombs? Let’s explore and learn exactly how Elden Ring works from character creation all the way to the dazzling crystalline backdrop of the game’s “second” zone.
Our journey begins similarly to other From Software games. In the beginning, I’m presented with a class choice and a starting item. The classes in Elden Ring have interesting names and classic archetypes, and it’s important to remember that your selection here is merely a selection of starting gear, stat allocations, and abilities – they do not lock you into any particular playstyle for the duration of the game.
There are nine starting load-outs, including a take on “The Deprived” class from Dark Souls, which starts at the lowest level possible, leaving you to build your character entirely as you please. Other classes come with an assortment of spells, gear, and starting Ashes, which are abilities tied to your equipment. These allow players to pick builds without “traditional” magic and still retain some powerful skills. Ashes include a vast assortment of abilities that range from continuous melee attacks, spectacular area-of-effect blasts, buffs, shouts, and more. In Elden Ring, many of these Ashes are modular and can be applied to various armaments, so if you find an ability you enjoy, you may be able to swap it to another item.
This isn’t universal swapping across the board, but it should lead to some extreme build diversity compared to From’s previous titles. In fact, you can also tweak with the scaling of gear and build perfectly to your tastes. For example, you could potentially make a sword that scales with strength and move it to something else entirely, like dexterity or a magic stat. The degree of customization involved with your armaments and abilities allows you to tinker extensively with your burgeoning bag of options as you move through the game and encourages creativity and experimentation.

I select the Hero class for this play session, a character with a healthy chunk of strength, hit points, and an axe. This is more akin to a barbarian type if we’re going by Dungeons & Dragons archetypes, but even though I don’t plan to use traditional magic, Ash abilities are essential. Before I get going, I also have the opportunity to pick a starting item, which is similar to some of the choices seen in past games, with one possible exception, something called a Stonesward Key. Reading the description states that the key breaks through an Imp’s Seal, so this sounds quite different than the other stock beginner gifts. Naturally, I proceed with this choice out of curiosity.
Our story starts with an extensive intro trailer that resonates with From Software’s signature expositional narrative style. We’re hammered with the fall of Queen Marika, and her demigod offspring vying for the power of the Elden Ring. The situation escalates to The Shattering, a tumultuous and all-encompassing war that had no clear victor. Perhaps the player, a tarnished of no renown, a “dead that yet lives” can become the Elden Lord and claim the great power of the runes and determine the fate of The Lands Between. A “maybe this is going to be a big boss” section of this intro is analogous to other From Software openings where we see some major characters and formidable foes in quick succession, including a loathsome dung eater, a deathbed companion, an all-knowing knight, and a chieftain of the badlands.
After that, I’m placed in a small building to begin the adventure. It’s called the Chapel of Anticipation, and there’s not a whole lot to do there, with a singular road leading out. The trail leads to another From Software staple, the tutorial boss encounter that you’re not really supposed to win. My battle with a giant creature known as a Grafted Scion, a bulbous mass of flesh with numerous appendages that have been stitched on, ends quickly as I die in mere moments. It’s probably possible to take this monster down right away for a neat bonus, but the next section likely happens regardless, where I black out and wake up in mucky water at the bottom of a hole. I’m assuming it’s possible to find a way back to the Chapel later in the game to take on the Grafted Scion with a more impressive arsenal at my disposal.

Next up is the tutorial segment, which is where many players had a chance to check the game out for the first time during the closed network test. I’m not going to go over every change here, but know that many things appear balanced differently in the final game, and most of the item drops and locations are altered from what was available in the test.
The so-called “tutorial cave” is a quick look to learn controls and accumulate a few runes before you head out into the greater world. And I recommend doing so even as a well-experienced veteran of From’s games to get a feel for all these different systems coming together, like stealthing, jumping, and weaving Ash abilities into your standard combat array. At the end of the cave, you encounter what is technically a boss, but it’s just a regular soldier. This battle is a bit of an odd anomaly as this soldier goes down in just a few strikes to any build with ease, but it’s not a bad idea to dip your toes in the pool before you go swimming.
This section is skippable, and loops back to the game’s first checkpoint. Checkpoints in Elden Ring are called Sites of Lost Grace, and they allow the player to perform the vast majority of their critical progression actions. They are numerous, placed all over the map, and fast travel is available at any time, making traversing the open world easy.

You can allocate your critical flasks between health and mana at these sites. While you start the game with only a few flasks, you can obtain more and improve their potency. Near this checkpoint is a shimmering, translucent wall and an imp statue. I noticed this structure in the network test but could not interact with it. However, that has changed, and I can consume my Stonesward Key to open up this area. Doing so reveals a deep, downward passage filled with poison, giant automated chariots with razor wheels and aggressive ghostly humanoids armed with bows and melee weapons.
The automated chariots follow paths down massive corridors, murdering anything in their way – the player must cleverly time their movement from safe alcove to safe alcove to maneuver downward. There’s high potential for death here, and after dying a few times, I decide to move on as time is limited and there’s a lot to do.
Coming up out of the dark reaches of the Fringefolk Hero’s Grave is the first time the scope and scale of the world come into play. A dazzling vista greets the player, full of windswept hills, mountains, clouds, and the shining brilliance of the Erdtree. This scenic, almost pastoral backdrop is one of the highly-differentiated biomes that players will explore.
Each biome features its own unique aesthetic, creatures, monsters, flora, fauna, and more. It’s a stark contrast to the dingy hole I’ve been in and immediately presents the player with a great deal of agency and opportunity. A mysterious masked NPC here offers the player a note of guidance, setting them out on a task to take on the game’s “first” big boss in Stormveil Castle, which you can see in the far distance. However, there’s so much to explore I doubt many players will hurry in that direction.
In the network test, this area was fun to investigate. Now that I’m in the full game, it’s hard to articulate how much better the experience is when there are no limits, no barriers, and pure unbridled exploration for as long as your bravery holds out. During this play session, a considerable number of areas were still off-limits. Still, I was able to explore the game’s first biome, Limgrave, with no restrictions, head into the second biome, and peek along the edges of other places I wasn’t allowed to go – like the blood-red skies and desert sands of the wastelands to the east. Limgrave itself is huge, and all of its areas, bosses, characters, and more were now open to me. As a zone, Limgrave is loosely divided into sizable chunks, being Western Limgrave, Eastern Limgrave, The Weeping Peninsula, and Stormveil.
But I start by heading to the church nearby, as it is one of the most important starting locations. You may be intimidated by a nearby mounted knight boss, who will likely devastate you at this point in the game, but it’s essential to make your way to the ruins of this holy site. At this location, you will be able to upgrade your weapon at a makeshift smithy and purchase valuable items such as your first crafting book and spirit summons.

Crafting consumables can make life significantly easier, and there are resources everywhere, so it’s a good idea to pick this core item up as soon as possible; you discover new recipes throughout the game as you find books around the world. As for the smithy, it’s a do-it-yourself setup, and your character lacks the skills of a master smith, so you can only upgrade your armaments a little bit. Perhaps we’ll find someone else later who can enhance them further.
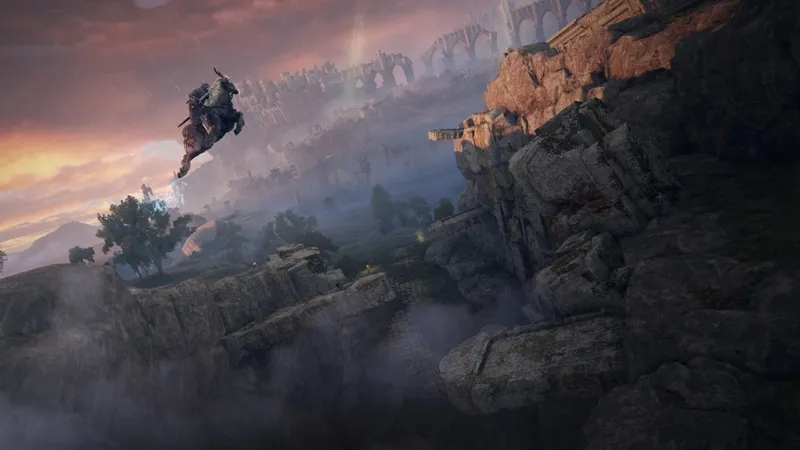
Soon after, I encounter Melina at another Site of Lost Grace, who acts as our Fire Keeper for this journey. With Melina on our side, I can now level up and allocate stat points at checkpoints. She also gives us access to the magical steed Torrent, which I can summon on demand almost anywhere in the open world, giving me access to high-speed travel, a double jump, and mounted combat.

You can’t use Torrent in many of the forts, castles, catacombs, mines, and other assorted delves found in the overworld, nor can you summon it inside any sprawling legacy dungeons. That said, Torrent’s speed is incredible for getting around the world fast, allowing the player unparalleled exploration abilities. While mounted combat feels a good deal less precise and compelling than From’s core melee offerings, it’s a great way to approach some enemies (including bosses) outside due to the extreme mobility. Upon receiving Torrent, my immediate inclination was to go everywhere in Limgrave that I couldn’t go in the network test.
Also at the church, I meet The Snow Witch, a blue humanoid character with four arms and two faces, one somewhat normal (as normal as it gets for a blue witch) and another spectrally overlapped on the first. You may remember The Snow Witch as the storyteller from one of the latest Elden Ring trailers, and she gives the player the ability to summon spirits. Spirits come in many shapes and sizes, including wolves, magi, skeletons, and even poison-shooting jellyfish. The summons I have access to in this play session are more varied than those available in the network test. They also feel significantly weaker, leaving me to wonder if the versions in the test were upgraded.
While The Snow Witch can’t upgrade my spirits and leaves after teaching me how to summon them, another character I meet later is likely to have that capability. Spirits can play a big role in your strategy and give you a significant edge during challenging encounters. But don’t become too reliant – there are areas in the game where you cannot summon spirits, and many bosses may have abilities that can destroy spirits almost instantaneously, negating your advantage. While a pack of aggressive melee monsters may be a great choice for one battle to keep tons of pressure on your opponent, another battle may involve huge area-of-effect components that will clear your entire troupe out in moments.

Racing forward with Torrent, I first come to a large pond. The water isn’t particularly noteworthy, but the huge bears milling about the area, almost lackadaisically, are of definite interest. One of players’ big questions was if the mount would trivialize the nature of exploration, minimizing the apprehension found in other games since they could theoretically just blaze by on the spectral steed. Enemies like this hulking bear put that theory to rest.
While they appear slow and burdensome to the eye, getting near these creatures makes them extremely agitated. They rise and attack with incredible range and speed, enough to surprise an unaware adventurer and knock them off their mount before they even realize they’re within striking distance. Being assaulted by one of these ursine monstrosities, I quickly veer off to the south of the trail toward an area known as the Weeping Peninsula.
Along the path lies a busy bridge, the Bridge of Sacrifice. Because the approach is full of melee, ranged, and artillery foes, it’s a segment that begs the player to either take another route or push through with Torrent’s velocity. Beyond the bridge, I meet Irina, who has escaped from a castle to the south. She tells me that Castle Mourne is a place where frightful howls have brought despair and ruin to all its inhabitants. Werewolves, perhaps? It’s up to the player if they want to explore and see what happened.
Heading south, I must make my way past a giant forged archer guarding the castle exterior with an enormous bow that functions as a ballista, able to eradicate the player at long range. By hugging the castle wall, it’s easy enough to creep up on the enemy from behind and tear him to pieces before he can fire his potent attack. Heading into the castle, it’s far worse than Irina implied. Bodies are stacked in heaps; werewolves would have been a walk in the park compared to what has taken over the once-noble house. Instead, we have chimeric beasts that are leonine, featuring snake tails and feathers as well. While they can’t take a ton of punishment, they are fast and dish out incredible damage in a matter of moments, so managing them as I move through the castle is important. Castle Mourne is a dungeon in Elden Ring, with multiple checkpoints and a boss within, making it a far more substantial dungeon crawl than a catacomb, cave, or mine, but more minor and less involved than a full-scale legacy dungeon.

Making my way past multitudes of minor chimera-humanoids and a few large ones, I get to a segment that Souls players have seen many times before. I need to carefully place myself to drop down precariously positioned rungs to get to the bottom of a descent, where any misstep equals a lethal fall. At the bottom of this segment are some minor islands leading to a water area and another island that’s clearly a boss arena, complete with a traditional fog gate. Inside is our first real challenge.
Bosses have a wide difficulty range in Elden Ring. Small dungeons with only a few rooms have less challenging bosses, and the giant legacy dungeons house difficult encounters. Castle Mourne seems to fall somewhere in the middle, offering a picturesque island duel with the Leonine Half-Breed, who wields a sword and boasts glowing red eyes as he stalks the arena looking for you. This boss features a pounce attack and several ways to gap-close on the player, so taking this boss on as the first thing you do fresh from the Fringefolk Hero’s Grave is probably a terrible idea. You’ll face more brutal foes later down the road, but this is a good taste of a mid-range encounter that mildly elevates my heart rate.
Having bested the boss, I receive a new weapon, the colossal Grafted Blade Greatsword. Unfortuntately, I don’t have the stats needed to wield it for this play session. However, it also comes with a special Ash ability called Oath of Vengeance that raises all of your stats, and also your poise – perfect for a hulking build that’s ready to trade blows and hit back with a gigantic, powerful weapon. Castle Mourne is missable, and although the game includes breadcrumbs like Irina’s message to try to push the player toward certain large areas, I imagine most players could overlook a significant amount of content on a first playthrough.
I’m still far away from making my way to Stormveil to take on the first “legacy dungeon” of the game, huge areas with multiple bosses and checkpoints where the player eventually collects the critical Great Runes in search of the unified Elden Ring. Instead, it’s time to go back to bear land and see what I’ve missed. There’s a towering Erdtree around here, identified with a huge marker on the map.
I spot a minor Erdtree outcropping that looks like a small luminescent sapling, and I pull a golden seed from it. Players should keep an eye out for these minor Erdtrees scattered around the world, as they offer up special drops that can improve your flasks. The more you find, the more it takes to improve your flasks, so while initially you may only need a single seed to improve your stockpile, eventually, you’ll need more per flask. This system encourages you to scour the world to hunt down as many of these valuable items as you can, potentially even before you take on any bosses, dungeons, or other assorted activities.

In this area, I see my first aetherial candelabra, a small white structure that stands out and summons a ghostly apparition that flits in and out of existence, leaving spectral footsteps as it walks. This is one method that Elden Ring uses to guide you to points in the open world, along with statues that shoot not-so-subtle beams of light at locations when activated. These particular interactions are more involved than spotting something with a spyglass because they force the player to follow the footsteps, possibly for quite some distance and likely through incredibly hostile territory.
Since deadly giant bears are around, I head into a nearby mausoleum with no visible markings. This locale is just a room with an elevator down, which I assume will lead to some kind of mini-dungeon or catacombs. Instead, I get an impressive and jaw-dropping shock as the elevator goes deep into the earth.

As I get to the bottom and look up at the emblazoned purple-tinged, potentially meteoric underworld firmament, I realize this isn’t some tiny cavern. This subterranean stretch is huge and potentially has multiple entrance points in the land above. There is, quite literally, an entire realm to explore underneath The Lands Between. The “sky” of the underworld glitters and shimmers like an aurora borealis, and despite being deep underneath the ground, there’s no need for torches to see down here.
Underground rivers flow through ruins crawling with aggressive spirits, and as I continue to push through as much as I can, I move into an area called The Eternal City. At this point, I’m simply running as fast as I can through to see as much as possible as more and more phantoms pick up my trail.
Before long, a Bandai Namco representative instructs me that I’ve seen enough of this area and that I should head back to the lands above. I’m not upset about this – there’s an entire world down here that I have no desire to spoil for myself or anyone else. I have many questions about how it connects to the standard environment, but in this play session, the unassuming elevator mausoleum is the only entrance I discover to the great below.
While I’ve taken a pass southward to the Weeping Peninsula, I’ve primarily ignored most sections of East Limgrave until now. It’s important to state that my passes through these areas probably bypassed a ton of content, as there are many major, minor, and cleverly hidden things to find in every area. But with the clock ticking and Stormveil looming in the distance, it is time to press on. Passing through a place in the rugged hills where wolves fall out of the sky to attack me, I hear a familiar voice in the distance. It’s a pot stuck in the ground, calling out for help. This is the famous “Pot Boi” who has become a sort of endearing mascot for the game in the lead-up to release.
Pot Boi’s real name is Alexander the Iron Fist, and he’s a warrior jar. I smack him out of his hole with a couple of well-placed blows, and he thanks me by handing me some Exalted Flesh, which I can snack on to get a temporary boost to physical damage. Alexander tells me that I may want to check out the Redmane Castle to the east, on the edge of the Scarlet Rot-blighted Caelid Wilds. Elden Ring uses friendly NPCs like Alexander to push players toward major landmarks they may miss, and while a trip to Redmane Castle is out of the question on today’s trek, it’s something I’ll remember for the future.

Continuing on my journey, I come to a dilapidated graveyard area, a traditional fantasy setting if there ever was one. Yes, there are skeletons here that come back to life after you knock them down once, so you need to be careful to keep an eye on fallen foes and break those bones down again. Here I meet the enigmatic golden-masked character “D” who holds a bust like he’s about to recite some lines from Hamlet. D hunts down those who “live in death” and warns us that the village nearby, Summonwater, has been claimed by death. He tells me that a mariner has made its home there. I couldn’t wait to see why I should be afraid of a dead sailor, so I immediately set off to the village.
I’m also becoming increasingly aware that many characters I’ve seen and met in Limgrave have masks, obfuscated faces, or even multiple faces, and I’m trying to piece together if that means anything. Before I can begin theory-crafting too hard, I’m faced with a broken-down town – a few ruined buildings and an enormous shallow lake. In the center of the lake is a small boat, which gives off an eerie lavender glow from a lantern. There’s some kind of undead skeletal sailor in the boat and a boss health bar, and orchestral music begins as soon as I approach.

This encounter is with the Bonebeckoner Mariner, who summons an endless tide of skeletal companions that pressure the player. While slow, the boatman and his boat have some dangerous abilities to watch. The mariner can raise the ship and bring it down to cause a crashing wave that does significant damage. He also has a major area-of-effect boat blast where it hits the water with such force that magenta crests of water do severe impact damage to anything around him. As with many From Software bosses, a cool head and careful thinking can help more in this encounter than twitch reflexes. Because the boat slams the shallow pool with such force, any skeleton companions in the mix can also be hit and washed away so a savvy player can manage the tide of undead with careful positioning. I’m quickly annihilated during my first attempt, but I’m back in the battle in mere moments thanks to a nearby Stake of Marika.

Stakes of Marika are positioned worldwide, often in places where you’re likely to meet an unfortunate end that aren’t close to checkpoints. The player can respawn at Stakes of Marika and get right back into the action, eliminating the once-dreaded “boss run” where the player has to trudge through inconvenient long corridors or elevator rides, while fighting numerous smaller enemies, before getting back into the boss fight flow.
During my second battle with the mariner, I choose to fight with Torrent, dashing around the lake to break up the minion summons and get out of the way of the boat’s reach. While I have an issue getting acclimated to how my weapon swings on horseback, it makes the fight considerably more manageable. The mariner falls, the lake is free of its undead pestilence, and I walk away with a spiffy new Skeletal Militiamen spirit summon and a piece of Deathroot. The Deathroot states that Beast Clergymen seek it out. I have no idea what this means right now, but that’s okay because I’m ready to keep exploring.
From a nearby cliffside, I can barely make out the silhouette of someone in the distance, standing atop a chunk of ruin. Carefully making my way down the ledges, I meet an arrogant man named Kenneth Haight, who claims to be next in line as the ruler of Limgrave. However, there’s just one problem: His fort has been overrun, and he needs someone to clean out the riff-raff.

Haight promises rewards and a festival should I complete the task, so I set off to the fort to clean things up. It’s pretty far, but some fast travel gets me there. Fort Haight is a mini-dungeon of sorts, with a lot of action focused on taking on bigger-sized opponents and troops simultaneously, but there’s no big boss battle or arena. Instead, expect to clean out enemies who love throwing bombs, attacking in multiples from awkward angles, and keeping pressure on the player. Atop the fort in a conspicuous chest also lies a curious item, half of a special crescent item that has no discernable purpose – for now.
Clearing the fort, I head to the nearest checkpoint outside and set the time to early morning, ensuring that time has passed since I did the deed. At any checkpoint in Elden Ring, you can rest until certain times of day, from early morning to the dead of night. While we don’t know too much about this system yet, certain special enemies only show up at night and the passage of time may be needed to set NPCs into action.
Kenneth is pleased that I’ve cleaned up his house and tells me that he’s going to return to his fort. I head back, expecting to see a festival in my honor roaring, but sadly Haight is done talking to me for now, as the next step of this quest chain isn’t available in the build I’m playing. However, it illustrates some of the exciting potential for world-altering throughout the game, so I remain intrigued as I set off, finally, toward Castle Stormveil.
Storms ravage the path to the castle, and I seek shelter in a worn-down shack just off the side of the road. Here I meet Roderika, who tells me she’s scared of what’s happening in the castle, with people’s limbs “being taken and attached to the spider.” The spider, incidentally, sounds a lot like the Grafted Scion I fought at the beginning of the game. I also get the feeling Roderika has a more critical role to play in this tale than just hanging out in a forgotten hovel. For now, she leaves me with a spirit jellyfish summon, a somewhat fragile ranged attacker that can poison opponents with its attack.
The road heads straight to the castle, but instead, I decide to head northward, up a winding and somewhat obscured trail. Here’s where things get even more fascinating. Somehow, I’ve made my way to the next biome – one that many assumed would require “completing” Stormveil Castle. However, one little tucked away mountainside trail allows me to bypass the area altogether. Arriving at a checkpoint on the outskirts of the new location, I make ready to explore but get a surprise when I sit down to rest. My companion Melina arrives and whisks me away to a magical place, the Roundtable Hold.

The Roundtable Hold is Elden Ring’s hub area, where you’ll meet tons of NPCs, use special services and upgrades, and maybe even get into some serious trouble. There are tons of characters to meet here even on your first visit, continuing to add to my prediction that this game contains more characters and dialogue than possibly all other modern From Software action/RPGs combined. While the hub is tightly condensed, closed doors and blocked-off spaces indicate that there’s more to the Roundtable Hold than meets the eye.
The Roundtable Hold exists outside of space and time and cannot be found on the world map – the only way to access it is via fast travel to the majestic center checkpoint. This is a gathering place for tarnished champions that are guided by grace – kind of like yourself. This fantastic place begs for thorough exploration, a bit of a mix between Arthurian and Bloodborne aesthetics. In the center room where I arrive, I meet Corhyn, a holy practitioner who can teach me practical faith-based skills. While I haven’t built my character for any kind of casting, I could still pick up a cheap Urgent Heal spell if I feel like it.
An armor-clad noble here named Diallos is looking for a loyal servant to his house called Lanya. Roderika, the woman I met in the hut on the Stormveil approach, also stands around the table and tells me that she’s here trying to find a purpose for her existence. There’s also a rather surly elder who seems to be some combination of annoyed and amused with my arrival to the hold but doesn’t have much else to say to me right now. D, the enigmatic undead hunter, is here and offers to give us the location of a notable Beast Clergyman to meet, marking our map in red.

The central hold room gives way to multiple adjacent rooms, so I also begin checking them out. I hear the all-too-familiar clanking of a blacksmith’s hammer as I move into one. This is the fairly large Blacksmith Hewg, who can upgrade weapons well beyond the capabilities of the do-it-yourself setup at the initial church, assuming I have the materials. Curiously enough, Hewg is a prisoner of the Roundtable Hold, chained to the wall. While I inquire about the state of his captivity, he declines to elaborate, and instead, I get some new questioning options regarding Roderika. Upon asking, Hewg states that Roderika has a gift for spirit tuning that she hasn’t become cognizant of yet. While I’m not able to activate this option during my play session, I’m assuming that Roderika becomes the source to upgrade and enhance spirit summons in the game.
There’s a closed door and a silent figure leaning up against the wall in an adjoining room. While he won’t talk to me, he does give me an emote for interacting with him, one that lets me execute my own nonchalant wall-lean. A bit further down the hall, I find a room containing “The Two Maiden Husks” which are two dried-out and rather gruesome characters that can take bell bearings from me for some purpose. I did not find any bell bearings, nor do I know the rewards from this system, so my curiosity is piqued moving on to one of the Hold’s other rooms.

A woman named Fia asks to embrace me in one room – apparently a sacred act. As I select yes, I make the connection that this must be the same Fia from the opening intro trailer, the “deathbed companion.” Fia’s embrace gives me a consumable known as Baldachin’s Blessing, which I can use to buff my poise. I can only carry one of these at a time, but Fia indicates that I can come back at any point to receive her blessing. Melee builds looking for another tool to burn off some focus points in place of the magical arts would probably benefit by having one of these around for tough fights.
Just off the main room of the hold is a large area that seems inaccessible unless I jump down from a balcony. Of course, I do. Immediately I see there are bloodstains all over, which doesn’t bode well. I’m attacked by an NPC invader, a Frenzy-Tongue. This adversary wields a scythe, has extremely high mobility, and boasts incredibly powerful frost magic. After landing a few heavy attacks on them and watching it barely take a nub out of their substantial hit-point pool, I accepted my dire fate. There are some nifty secrets and rewards down there, but this isn’t the right time. After upgrading my troll club a few times at my new blacksmith friend, I take my leave of Roundtable Hold for now.
At long last, it’s time to approach Stormveil Castle. Yes, I have the option of going right to the “second” biome, but let’s see what this place is all about. I have to defeat the wily Margit the Fell Omen to gain entry. This boss was available in the network test and can be a decent challenge, especially when the player may face them. Still, it’s important to note that the open nature of this game ensures that no player will have the same experience.
Margit would be much easier if I explored all of Limgrave and the many other areas accessible already. Even so, mobbing him with a pack of spirit wolves and using my previous experience with his somewhat limited moveset makes short work of him. Upon defeat, Margit the Fell Omen drops a Talisman Pouch that confers a talisman slot, a permanent player enhancement. Talisman slots in Elden Ring work similarly to ring slots in previous Souls games, so having as many as possible is a good idea. With my additional Talisman slot, I now equip one that makes me more resistant to physical damage and one that resists fire. A wide assortment of talismans can be found, so it’s nice to have a mix to swap, especially for certain circumstances that call for specific resistances, maneuverability, or damage.
Now I choose to approach the Stormveil Castle via several different paths and directions. The castle is labyrinthine and large, and there are quite a few routes to take and get lost. Even though the direct route to the final boss is easy enough to find once you know the way, it takes quite some time to make it through the castle’s many quirks and mysteries. Even then, I certainly didn’t find everything. The addition of jumping gives even more directions to explore as I find myself hopping over parapets and rooftops, sometimes quite precariously, in search of new checkpoints, monsters, and even some relatively safe areas of interest that include new NPCs to meet and greet.
I meet the gatekeeper near the castle entrance, who warns me that I should take the side route through a broken castle wall to avoid the hellish army that awaits beyond the main gate. Even if you don’t plan to head through the main entrance now, both paths are viable and contain many secrets – and even feed into each other at various points, so you may as well open both routes by requesting the gate to be opened. Like many other inhabitants of this land, the gatekeeper has no love for Godrick and would love to see someone come in and remove him.
One of my first forays onto the castle grounds takes me to a grafted lion. Not a half-lion humanoid, like the one in Castle Mourne, but an actual giant lion that’s had swords chained and grafted to its hulking body. This monster sets the pace for some masterful environmental storytelling that Stormveil Castle sets up and delivers on. From this ruined beast to eagles with razor talons that are actual razor knives, the ghoulish aforementioned spiderlike Grafted Scion, and rooms full of hanging limbs, the player experiences the story of grafting and Godrick’s obsession with appendages around every corner. Butchery takes on a whole new element in this kingdom as body parts are ripped and attached to other organisms to make new and monstrous creations with varying degrees of success. There are no audio tapes to find or laborious journals to look over; the tale of Godrick’s grisly reign is conveyed to the player through grotesque discoveries throughout the grounds.
Past this creature lies a path outside the castle to a broken bridge, full of massive forged soldiers. Rather than battle them, I run to the very end of the bridge, where several ledge drop-offs unveil something downright bizarre, a tiny glowing purple portal. I interact with the doorway, sending me to another location across Limgrave, a previously inaccessible point far along a giant bridge.

I arrive at the Divine Tower of Limgrave, leading me to believe there are Divine Towers in other biomes (and the map reinforces this theory with a similar-looking space in the second area). However, the giant doors to this tower are blocked shut. If I had the other half of the crescent icon that I pulled out of the fort, I might be able to open it and… ascend to the heavens? If we can go beneath The Lands Between, is it possible to climb above them as well? There are many hints that such a thing may be possible, including plenty of architecture strewn about Limgrave that looks like it may have fallen from the sky, but it’s a puzzle that will have to wait for another time.
Luckily, I can port back into Stormveil and continue heading through the castle. My journey takes me to an area hinging around a tremendous central elevator, and you unlock various routes to come back to it from different positions as you explore. My trek takes me to a horrible basement next to a macabre kitchen where one of those vicious grafted balls of flesh and sinew patrols.
There are many enemies here, limbs everywhere, and even a giant troll bled out and strung up; this is not a happy place. However, exploring upward, along the walls and roof areas of the castle proves just as lethal in other ways, with birds that toss explosive barrels and blast fire. Throughout the castle, I must continue to be wary of soldiers with horns, which they can blow to alert huge swathes of enemies to abruptly mob me. The castle also features intimidating knight enemies clad in heavy armor and shields. These opponents can spin powerful wind gusts with their swords and attack for colossal damage, making them one of the most threatening assailants yet. There’s a small chapel I discover within the castle where the friendly Sorcerer Rogier hangs out. Rogier sells a handful of spells if you’re looking to round out your arsenal of abilities.
As I continue to ascend the castle, I also note another Imp Vessel here I can activate with a Stonesword Key, making me think that these keys function as consumables to find special items much like the Pharros Lockstones in Dark Souls II. In one curious chamber, I discover a painting that I collect. This discovery is the first of several paintings I find in my play session, which depict a specific location in the world. The description of the item states that I may find the artist’s spirit if I go to the area shown in the painting, tying these paintings to exploration, memory, and map mastery. I also run into a small contingent of pot creatures. Unlike our friend Alexander, these pots are hostile and attack me on sight. The large pot in the group features a spinning whirlwind-style attack that inflicts significant damage, so it’s unwise to underestimate these vessels. There’s a ton more to explore and discover in the castle, but eventually, the journey takes me to Godrick the Grafted, a signficant challenge, and a demigod lord.

Godrick boasts a truly astonishing number of attacks, so much that even after attempting the battle well over a dozen times, I was still seeing new abilities or mixups on known skills. Even worse, many of these skills were able to kill me in just a few hits. Godrick does have windows of opportunity, and learning them and exploiting those scant chances to get in for damage is critical, depending on when you choose to engage this twisted king and his many arms.
My attempts on Godrick took place around character level 20, and a Bandai Namco representative said that From Software expects players to take him on around level 40. If you were expecting spirit summons to trivialize this encounter, that’s not the case with what I had available. Godrick has such powerful skills that whatever you choose to bring into the fray can be slain almost instantaneously, though Roderika and spirit tuning may be able to alter this.
My early strategies attempted to ping-pong Godrick back and forth from my spirit jellyfish summon, keeping its attention up close so that it could squirt a poison payload at the corrupt king to continually tick down his massive health bar. However, whenever I would mess up the back-and-forth dance for even a second, Godrick could crush my little friend with just a few attacks. Instead, the spirit summon I eventually settle on is the Skeletal Militiamen, who can come back to life after dying – making them a great option for an extended encounter.

Godrick is a tricky foe with a packed arsenal of animations, and taking him down is no easy feat. Halfway through the fight, Godrick decides to graft a dragon head to his arm, adding even more moves to his arsenal including a grab attack, flames from above, and a flamethrower assault that needs to be avoided carefully. It would have been a far better use of time and energy to go exploring and come back with some new tools, but I dug in, and after twenty or so attempts, Godrick the Grafted was bested. It’s a hell of a fight and a considerable test. For an early game big boss, this indicates that the antagonists later on in this game will match or exceed the quality of epic From battles like Nameless King, Sister Friede, and Darkeater Midir.
With Godrick defeated, I obtain a Great Rune and a Remembrance of Godrick. You can consume the Remembrance for a large chunk of runes, but I also assume that this is the equivalent of a “boss soul” and that it can somehow be transposed or altered into a weapon, armor, or magic down the line. For a little bit of additional flavor, the gatekeeper from the beginning of the dungeon shows up and stomps on Godrick’s fallen head, talking a lot of smack and asking him what a big bad leader he is now, eh? I hope with my victory the people in Stormveil will stop slicing people apart and attaching organs, but we’ll see what happens.
The next chapter takes me to the area I came to earlier up through the concealed mountain path. I’m told that I’m only allowed to look around for 30 minutes once I enter this zone. This biome is a huge change from Limgrave. The areas around the magical academy Raya Lucaria are steeped in bold blues instead of lush greens. A soft layer of fog envelops much of the mostly shallow water area, with glistening crystals everywhere. All new enemies occupy this place, far unlike the trolls, humans, and wolves of Limgrave.

My initial foray into the wetlands has me placing a marker on the map to lead me to the area’s stele monument, a stone structure that houses a map fragment that will reveal the area’s topography to me. Without map fragments, exploration is still possible, but knowing the region around you is immensely helpful, especially when entering new territory. Almost immediately, I’m waylaid by packs of roving primate warriors armed with crude bone implements and displaying war paint. Trails don’t seem to exist in the middle of the damp, so I veer off to the right where there’s a stone structure to help get my bearings.
Something immense strikes my eye out in the distance, a shimmering blob; naturally, I begin moving toward it. It’s actually a giant lobster, and it’s not very happy to see me and starts aggressively moving in my direction. Since I’m on Torrent, I assume outrunning this sea cockroach will be easy, but it’s disturbingly speedy in closing the gap between us. I run a few routes around some stone structures, trying to shake it off my tail, and to my shock and horror, the lobster squirts some kind of acid that crumbles the stone barriers before my very eyes.
I head in another direction, taking me out of the splish-splash of the shallow water and onto a green field. The field has multiple giant metal goblin heads, some upright and some half-buried, making me wonder if this area was once submerged and where these things came from and what their purpose was. These objects seem far more technology-inclined than anything I’ve seen in the game to this point, with what looks like a cannon poking out of the exaggerated goblin grin.
Passing through this field of strange oddities, I press on, making my way inside a crystal cave. The cave is full of this region’s crystals, including crystals on enemies. I’m attacked by snails covered in crystallized structures that shoot more crystals, dishing out potent ice damage. This cave is larger than the others I’ve seen and includes multiple paths and an area deep below that I can see but can’t discern how to get down. Given that my clock is ticking, I move on from the cave and head north to a breathtaking sight.

Here, the shallows become the deeps, and I’m forced to travel atop half-submerged buildings amidst all manner of sea life. Yes, there are giant enemy crabs here. There are also turtle warriors that would almost be adorable if they didn’t come with a bunch of different weapons and travel in packs. Balloons sail high above the waterline. Wildly different from anywhere else I’ve been, this area conveys considerable sea energy mixed with magical wonder. It’s a beautiful sight, and high above lies where I’m trying to get to, Raya Lucaria Academy. Ostensibly, this is the next huge legacy dungeon. I get another taste of From’s masterful environmental storytelling during the approach.
Those discarded goblin-headed structures resting gently in the field of grass earlier? I get an up-close and way too personal look heading up to Raya Lucaria as I see these powerful war machines in action, able to bellow fire out of their mouths. Dodging a veritable army as I ascend the steps up to the academy, I’m not entirely shocked to see that the main door is inaccessible – I’ll need to find a glintstone key to enter. Knowing that my time in this realm is almost up, I check the map to find one more area of interest to hit before the buzzer, but I also take a few moments to appreciate the breathtaking ambiance of this area, where the brilliant blues have reached an apex and been combined with magical lighting and flair. This realm is a place where magic happens, I am quite sure of that. And looking around at what’s happened to the region, not all of this magic is of pure intent.
In almost 10 hours with the game, I feel I have barely scratched the surface of what the world has to offer, and much more happened on the adventure that I simply don’t have room to relay. While I still have to play the final game, if this session is any indicator, Elden Ring may turn out to be From Software’s best game, and an incredible triumph beyond measure. In this enthralling adventure, fascinating discoveries await around every turn.
Check out GameInformer.com/EldenRing for additional information from our chat with Hidetaka Miyazaki, exclusive video, gameplay takeaways, and more!
This article appears in issue 343 of Game Informer.


Explore your favorite games in premium print format, delivered to your door.


