Be the first to get Game Informer’s August Issue. Subscribe Now
The Secrets Of Nearly Every Room In Breath Of The Wild’s Trial Of The Sword


The Trial of the Sword is the best, and most challenging, part of the the first batch of Breath of the Wild's DLC. It's tough, but certainly not impossible, and knowing where to find the assorted secrets goes a long way in keeping you alive for the duration. Here, we're going to tell you where to find those secrets, but also let you know how we survived the trial so that hopefully you can do the same.
First up, before the secrets, some overall tips:
Bombs are your friend: You don't get to take much into the trial with you. Your health, your stamina, and your runes. That last one is important to remember. Your bomb runes are invaluable in helping you reserve your weapons and you should use them generously. I would often switch back and forth between sphere and cube in order to keep the explosions going.
Stasis is also your friend: I've never forgotten that Link has bombs, but stasis is one ability that's easy to overlook. It's great for bosses, and the tougher bokoblins and Lynels.
Be conservative with food, but not too conservative with weapons and arrows: Save the food you find for cooking when you have a break, but don't be afraid to use your more powerful weapons, shields, and bows. Much like the larger game, there is almost always a stronger one around the corner, and arrows are surprisingly plentiful, especially when you make sure to pick up all the single arrows before moving onto each new level.
Horde your ancient arrows: Ancient arrows are a different story. Save those for the end. You will encounter two lynels and two mobile guardians near the end of the final challenges. Those are the enemies that need to take ancient arrows to the skull.
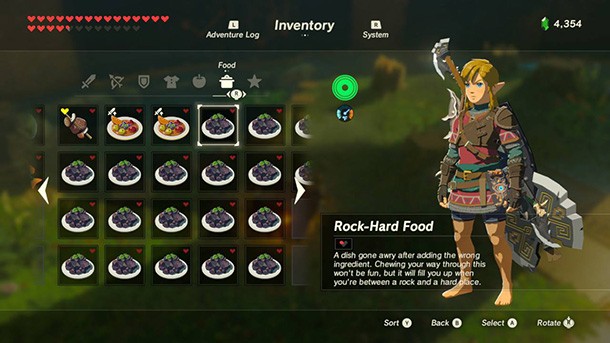
When the going gets rough, eat ruffage: It's only worth a quarter of a heart, but you can cook single pieces of wood to make Rock-Hard Food. In the rest areas, you can blow up trees to make the food in order to refill those last few hearts before moving on.
Don't cook fairies: Just keep the fairies in your pocket. They're more valuable as a revive than a stronger potion or meal.
Beginning Trials
Floor 1
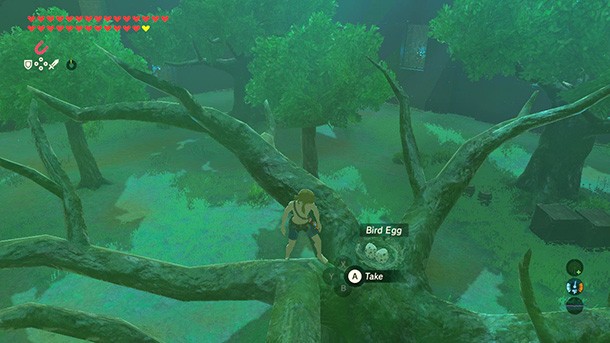
The First room is a simple one and should cause you too much trouble, but it does contain one secret that is easy to miss. The tree that stands right next to the exit contains a pair of eggs, which will be great for cooking a little later.
Floor 3
This room contains two treasure chests that are easy to miss. They’re high up on the walls to your back and in front of you. It is possible to climb the trees, thrown bombs, and detonate them in mid-air to get their rewards, but if you want to get fancy, you can use the flame trails from the chuchus to airlift yourself up to the platforms.
Floor 5
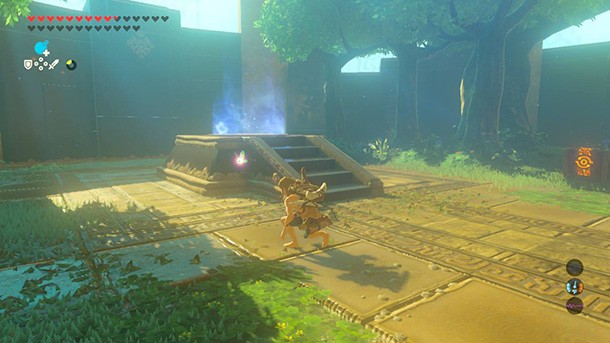
Make sure to climb a tree and shoot out the torch in the skull cave’s eye to take care of a lot of the bokoblins right away.
Floor 7
This is the resting room and one thing I missed on my first attempts was the fairy floating near the exit. If you rush in, it will fly away. Make sure the first thing you do is to sneak up on the fairy carefully in order to swipe it. After that you can go for the chests, the fish, apples, and assorted mushrooms. If you’re short a few hearts, now is a good time to blow up trees, make some Rock-Hard food.
Floor 8
There is a treasure chest under the water in this level. If you use magnesis, you should be able to spot it pretty easily.
Floor 9
The wizzrobe is your biggest challenge in this room. I would use stasis to headshot the crap out of him with arrows and take his lightning rod.
Floor 10
And then use the lightning rod on these guys. Make sure you climb to the top of the structure to paraglide over to the nearby platforms and take what is inside the boxes.
Floor 11
This room has a pair of chests, so take note once you’ve cleared the room. There is a fairly visible chest that can reached by flying to the left from the top of the structure in the back of the room . Near the entrance, there is also a grouping of rocks hiding a chest that can be surfaced with magnesis.
Floor 12
This is the end, so use stasis to pause the hinox and shoot him in his eye and then hit him in the butt. I went overboard and blew up all his trees so he would have nothing to throw at me, but I was a little bitter about my first encounter with him, so maybe that was going overboard.
For tips and secrets covering the middle trials, head to page two.

Middle Trials
Floor 1
There are two chests in this opening level that are easy to miss. One in the right area, and one in the forward facing area. The one on the right has a bundle of leaves below it, but you don’t need to waste a fire arrow. Just stand below it and throw out a bomb and it will float up for you to detonate on the platform. You can use the same tactic for the one on the forward area.
Floor 2
This level has a similar chest high on a wall situation on the diagonal opposite of where you start the level. The solution is the same – float a bomb up to the platform and detonate it.
Floor 3
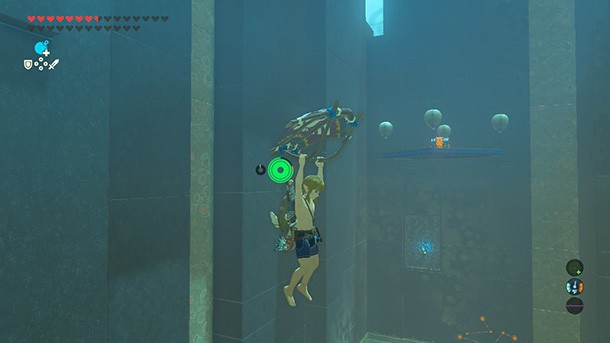
This chest is harder to miss, but if you fly up and look to your left, you will see a chest to your left floating in the air with the aid of some balloons. The trick with this chest is to make sure to hit the right balloons so that the chest slides off the platform onto solid ground and not into the abyss.
Floor 4
This room also has a floating chest suspended by balloons. It will be on your right, but I would take care of the stationary guardian in front of you before tackling it.
Floor 6
There is nothing particularly interesting in this room. Just make sure you grab the fairy.
Floor 11
To take on this Hinox in the dark, don't forget my earlier tip – stasis is your friend. It helps tremendously here.
Floor 13
One strategy you can use here is to actually let the giardians chase you as you drop bombs by your feet. It keeps you from getting overwhelmed, and you can generally outrun them pretty easily. If you have any electric equipment, use that on them, because electricity will often take them out in one hit.
Floor 14
Take out the smaller guardian enemies before you do anything here.
Floor 16
If you've been doing the shrines, you've already done plenty of these feats of strength. We believe in you.
For tips and secrets covering the final trials, head to page three.
Final Trials
Floor 2
Keese are easy to kill, but lightning keese in a storm are incredibly dangerous. Be very careful around these guys. Keep your distance, and throw bombs at them. Don't waste your arrows. Also, there is an easy-to-miss chest embedded in the ground beside the skull cave. Use the magnesis rune to pull it out of the ground.
Floor 3
The best tactical advice to offer here is to look out for the spikes in the ground. On more that one run, running into those things would be where I lost my first heart. It was embarrassing every time. After you clear out the enemies, there are two chests. One is reachable simply form climbing the tower. The other must be pulled toward you from the top of the tower with magnesis.
Floor 5
After taking out the boss, make sure you track down the buried chest using your magnesis behind the wall.
Floor 6
The nice thing about this rest area are the hearty truffles. Those boost food significantly, so don't miss them.

Floor 7
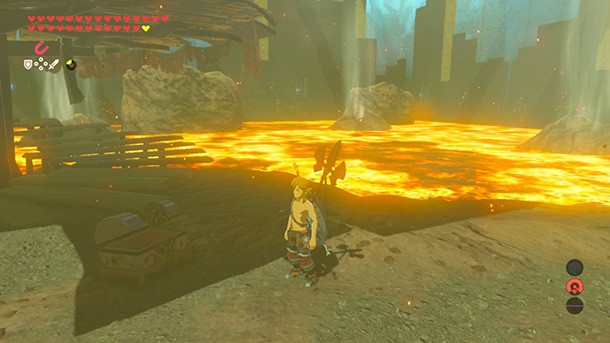
It's a bit of a risky move, but don't kill the octorok firing boulders right away. By this point you should have a handful of rusty weapons. Drop them in front of him and he will suck them up and spit out more powerful, non-rusty versions of your equipment. The risk is catching them with getting injured. After that, you can make him eat a bomb. Also, it's worth noting that if you fall in the lava it's not game over. You will lose some hearts, but you will survive.
Floor 10
Before leaving this room it is crucial you go to the bottom of the tower, look towards the entrance of the level, and use your magnesis to pull a chest you see out the of the lava. There are ancient arrows in there, which will be invaluable later.
Floor 11
A good tip here is to blow up the piles of rocks and expose the jets of air before the fight starts, then shoot at this weak point from the air.
Floor 12
This is another rest area. I would recommend taking off your pants to sneak up the fairies. It helped me anyway. Don't miss the Hearty Radish! It's right to left of where you start. It's great for cooking. Also, there is a reason this room is filled with spicy peppers. Winter is coming.
Floor 13
You should have made some spicy dishes, but to conserve those, you can equip a fire weapon to stay warm until you're in a big fight. You can also stand next to the pillars of ice with a fire weapon to expose their secrets.
Floor 14
Make sure you melt those ice pillars, one of them has some niffy ancient arrrows for you.
Floor 16
The ice pillars for this boss fight expose wind currents. Get those set up before starting the fight.
Floor 17
Climb a tree, jump off, initiate slow motion, use an ancient arrow. I wouldn't recommend messing around. You can also use Stasis on Lynels.
Floor 18
Get all three fairies, and make sure you cook the hearty bass individually because those will be some invaluable health-filling dishes.
Floor 19
There will be a temptation to use ancient arrows here. I wouldn't do that. It's not too difficult to take them on one by one, attacking them form behind. There is usual an angle you can find to avoid lasers from the guardians you have accidentally awoken. Remember that Stasis is your friend.

Floor 20
There are some horses to the right, and I would recommend grabbing one to approach the guardian. Mostly, because you want to get in the air to fire off an ancient arrow. Vaulting off horses gives you a lot of height.
Floor 21
Get up high on top of one of the pillars as soon as you can, and take note of the chest on top of the middle pillar. The flying guardian will mostly leave you alone unless you get in its light, so don't do that. You can use an ancient arrow on this guy, but I am fan of picking off each of his helicopter arms and ripping him apart while he is grounded.
Floor 22
It's not too difficult to separate these guys to focus on them one at a time. I took out the turret on the right first, then floated over to the guardian and use an ancient arrow, and then use the previous method for the flying guardian. That's how I did it anyway. Search the area where the flying guardian patrols thoroughly. There are two chests inside.
Floor 23
You should have some ancient arrows left. Sprint to a tree and, get up high, leap out, and take care of that Lynel before you do anything else. Once he's taken care of, everything else should be pretty straightforward. If you have bomb arrow, might as well use them.
You did it! Congratulations! Now go out and hit some stuff with your powered-up master sword. You earned it.