Our extra-large special edition is here. Subscribe today and receive the 25% longer issue at no extra cost!
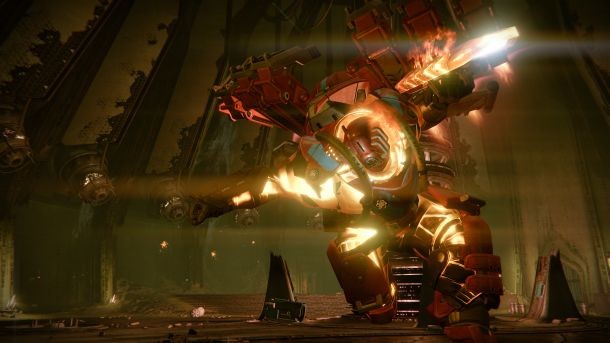
Leveling Tips Decrypted From The First Week Of Destiny: The Taken King

Many of our editors have been spending time over the last week digging into The Taken King, and discovering that there are several smart approaches to keep in mind while leveling. We’ve gathered some of the most relevant tips here. Most of these ideas are targeted to players just getting started with the new content, but even veteran players may find some suggestions worth remembering.
Leveling and Light
The biggest change on hand for The Taken King is understanding the difference between character level and light.
Character level is pretty straightforward, and it’s not going to take you long to hit level 40 if you’re playing on a daily basis. All you need to do is kill enemies and complete quests. You should also make a point to pick up any and all bounties you can to speed the process along, because lots of good things open up at level 40, including the option to equip the most powerful gear in the game. Also, remember that if you're not just a Taken King beginner, but you're starting Destiny for the very first time, then the game includes an option to boost a single guardian up to level 25 right away. To so so, just use the Spark of Light that arrives via the Postmaster.
Most of the rest of this article is focused on light value and other aspects of character development, which improves your guardian over a much longer stretch of time.

Understand Infusion
One of the most common questions that has cropped up among the player base is understanding how and when to use infusion to improve your gear. Ultimately, it comes down to personal choice, but here are some things to keep in mind.
First, make sure you grasp the essential concept. Use infusion to improve an item that you like, but that might have a lower light value that you want it to. To improve that value, you need to have a second piece of gear from that same slot that you’re willing to sacrifice. Select the weapon you want to improve, select the Infusion option in its upgrade screen, and then select the item to sacrifice. This expendable piece needs to be a blue or purple item from The Taken King, and it needs to have a higher light value than the piece you’re aiming to improve. One other important note – the item to be sacrificed needs to be unlocked, so that it’s available for dismantling.
So when is it worth completing an infusion? In most cases, the answer to that question is going to be governed by your current stock of Legendary Marks (which we’ll discuss more later). If you’re a little short on this valuable currency, infusing weapons and armor all the time is a bad idea. But especially as you hone in on gear pieces you really enjoy (whether for functional or cosmetic reasons) infusing those items to make them better is a great option, especially since The Taken King tends to provide a healthy number of high-powered blue and purple gear pieces once you hit level 40.
When completing an infusion, you want to maximize for the greatest light value improvement. Again, this becomes a matter of how many legendary marks you have on hand. If you’re flush, then consider incremental improvements for best results. Here’s what we mean: Let’s say you have a purple sniper rifle you really like at 250, a blue fusion rifle at 260, and a purple shotgun that you don’t like very much at 290. Each time you infuse a weapon, it’s going to move its light value up by approximately 80% (there’s some rounding that happens). Thus, if you really want to get that first purple 250 sniper rifle as high as possible, you should sacrifice the 260 fusion rifle first, and then sacrifice the 290 shotgun. But to do so, you’ll pay a high premium in the infusion cost, which is going to hit you hardest in Legendary Marks.
[Next Page: Making the most of your engrams]

Capitalize On Engrams
If you’ve played even a little bit of Destiny, you’re familiar with the idea of engrams that decrypt into items for your character. But with The Taken King, there are some simple steps to maximize what you get out of these engrams.
First, unlike in Year One, it’s worth the extra time to look at each new item after it decrypts, and decide if you should equip it right away. If the light value on that item is higher than your currently equipped gear piece, you should equip it before decrypting additional engrams. That’s because Destiny’s backend loot system now pays attention to your current light value, and often tries to offer rewards that improve your character.
Also, if you’re running multiple characters, think about which character you want to use to decrypt the engram. For armor and class items, you need to decrypt the engram on the class you hope to improve. Decrypt a chest piece using a Titan, and you’ll usually get a Titan chest piece. The same is not true for weapons. In the case of weapons, wait to decrypt the weapon engram on your character with the highest light value level, in order to get the most powerful weapon out of the deal.
Start Your Exotic Collection Early
The community is still figuring out some of the mysterious new exotic items that are available in The Taken King. But there are some that you can get started on almost right away, and you should do so.
The Boolean Gemini is an excellent exotic scout rifle, and it’s one of the easiest deterministic paths to an exotic in the game. But in your excitement about heading to the Tower to get going on The Taken King content, you might forget to head to the Reef. In so doing, you’ll miss out on an early start to the questline that results in the Boolean Gemini. Make sure and stop in with Petra and Variks as soon as the option appears.
One of the more elusive exotic weapons in the game is Touch of Malice, and the process for obtaining the scout rifle has a lot of steps that go beyond the scope of this article. However, to eventually get it, the first step is easy. When exploring the Dreadnaught, if you see a small blue piece of rock in a hidden alcove, take the time to snap it up. They're all over the place, but they're hard to notice. Acquiring these calcified fragments will start a quest with Eris Morn that eventually leads to the Touch of Malice.
That’s not the only exotic quest that has its beginnings with Eris. Once you’ve completed the opening story arc of missions, Eris has a new questline that leads to your heavy weapon sword. That legendary sword can eventually transform into an exotic sword. You don’t need to worry about that process right away – but you should follow two important rules: Don’t dismantle your legendary sword once you get it, as it still has room to grow into something better. And when choosing between the arc, void, and solar options, it would be wise to select a different option for each of your three guardians. If you’re only running one or two guardians, we recommend arc or solar as having the most utility across the breadth of the game as it currently exists.
[Next Page: Where to get Legendary Marks]

Legendary Marks Are Your Friends
We’re only a week in, but already it’s clear that Legendary Marks are one of the most important things to keep track of as you aim to improve your guardian. They’re used for various important tasks, including building Year Two versions of some of your old Year One exotics, infusion of your items, and buying new legendary gear.
One of the easiest ways to get a steady flow of legendary marks is to complete the daily heroic story mission and crucible playlist every day. Doing so provides an influx of legendary marks which can fuel your other endeavors. You should also make sure and complete the story missions that open up after you complete the primary Taken King narrative. Many of these additional story missions are labeled as “The Taken War,” and they often provide significant legendary mark rewards.
How should you use those marks? Like with the infusion discussion above, the decision is really a matter of personal taste. However, our experience so far suggests the following.
First, if there are one or two exotic blueprints that you’re desperate to move forward to Year Two, it may be worth the investment to do so. For instance, if you’re deadly with a Suros Regime in your hands, go ahead and pay to get the Year Two version – having a weapon you’re skilled at using, or an armor piece with a valuable perk for your playstyle can pay dividends.
Second, we recommend spending marks to get a legendary purple ghost shell with a high light value. It may be still largely anecdotal evidence at this point, but in our experience during the first week, these ghost shells are harder to come by than many other gear slots, and since these shells now contribute to your light, getting a good one can make a big difference to your ever-growing light value.
After that, we recommend using legendary marks to buy select vendor gear, but hold off on spending all your marks this way. As a general rule, The Taken King offers a healthy supply of strong blue and purple gear as natural drop loot in the world, so overspending on vendor gear is a waste, especially when there are other things you need to spend Legendary Marks on.
Instead, once you have a relatively solid loadout, switch over to infusion as a good place to invest additional Legendary Marks. That way, you can find a perk layout you find valuable, and then use infusion to get that piece up to a satisfactory light level.

Select The Right Gear
We alluded to this point earlier when discussing the cryptarch, but it bears repeating for broader practice throughout the rest of the game. When you’re first leveling your character, it’s wise to pay close attention to each new gear piece you acquire. If that gear piece might raise your light level, it’s probably a good idea to equip it right away before doing anything else. Once again, that’s because the game pays attention to your current equipped light level when determining subsequent loot.
One other factor to consider when selecting your armor, class item, and artifact (once you can get one at level 40) is how that gear affects your three core stats of intelligence, discipline, and strength. The Taken King adjusts the way those stats work, providing distinct tiers that reduce your cooldown for your super (int), grenade (dis), and melee (str). As such, pay close attention to how each gear piece changes which tier you are in for each of those stats. Having an item that almost gets you to the next tier isn’t helpful, but if you can equip a different item that does cross one of the tier thresholds, that’s a meaningful difference.
Ultimately, you may have to make some decisions based on whether you maximize for an ability like intelligence, or a higher light value. As you’re leveling, we strongly recommend prioritizing light value, as that universal score will affect all your subsequent drops. Later, once your character has several builds that keep him in the range of 290+ light, you can experiment more.

Other Tidbits
You should eat the 2500 glimmer hit, and pledge allegiance to one of the factions early on in your playtime. All you need to do is head to one of the faction leaders in the Tower, and you’ll get the option. It’s worth it so that you can begin getting highly desired faction loot from leveling through those factions. As a side note to returning players, this means that you’re no longer tied to wearing a class item in order to gain rep with a particular faction.
Banshee, the gunsmith, has a new rep system in place that you should use. Build up rep with Banshee by completing his weapon tests (which in practice are like completing an extra set of bounties). Once you have rep with him, you can order a cool purple legendary weapon that will arrive on the next Armsday, which is every Wednesday. Just be aware that once you put that order in, it will take up a slot in your inventory.
The weekend vendor, Xur, may be a carryover from Year One, but you should still take advantage of what he has to offer each week on Friday and Saturday. Use strange coins to buy relevant Year Two items for your guardian. It pays to watch his inventory every single week if you can, and make sure you have enough strange coins on hand to purchase what you might need.
As a general tip, while there are lots of factors that can play into advancing your light value, the simplest tip for fast progression is to spend a good bit of time doing both strikes and the Court of Oryx event in the Dreadnaught. Both are likely to net a hefty collection of valuable loot in a short amount of time. In particular, you get bonus rewards and reputation in strike playlists if you stay in the queue repeatedly from one strike to the next without returning to orbit.
Finally, we should take a step back to point out that your big goal in Destiny should be to enjoy yourself and take your time. While some of the tips above may help to speed or ease the process of character improvement, there’s no special reason you need to rush through the process. The Taken King features a wealth of new quests, stories, and ways to play. With that in mind, our best suggestion is that you play how you want, and let the game worry about how fast you might level up. Have fun!

Popular Content


Get the Game Informer Print Edition!
Explore your favorite games in premium print format, delivered to your door.
- 10 issues per year
- Only $4.80 per issue
- Full digital magazine archive access
- Since 1991