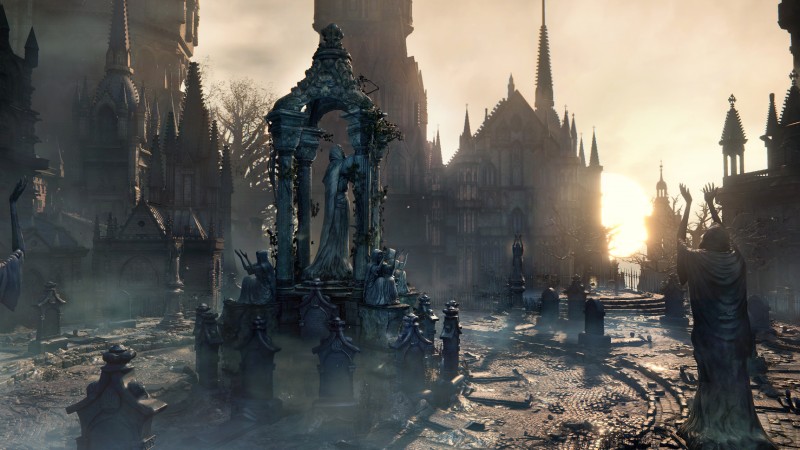
Bloodborne Tips And Tricks

As difficult as it is, playing Bloodborne without specific pointers or tips is a true journey of exploration, discovery, and achievement that is essentially unrivaled. I suggest playing it that way, and the “Bloodborne: Spoiler-Free Guide For New Players” article is safe to check out if you’re looking for basics.
But if you’re looking for a leg up and don’t mind reading about specific strategies to handle bosses and some places to land essential items and progression unlocks, here is some valuable knowledge gained from my playthrough(s). They may not be the 100 percent “by the book” methods, but they worked for me! WARNING: SPOILERS AHEAD.
Blood Vial Farming
Over the course of the game you’ll find yourself in dire need of restocking precious blood vials. The easiest place to do this is unlocked early in the game, via a round-trip of the Central Yharnam area. This path offers tons of spawns that drop blood vials and becomes an increasingly trivial roundup as you gain power. Start at the Central Yharnam lamp, exit via the left gate killing the two ogres, work into the under area and kill the wolf-men, dip into the sewer area real quick to take the ladder up, killing the ogre there, up again and up to the main bridge where the Cleric Beast is, where two werewolves and yet another ogre wait to drop vials. You can easily go from 0 to 14-20 vials on a single trip on this run, and it’s fast and easy!
Farming Echoes And Bullets
I recommend farming blood echoes to level up or purchase new gear. The best place I found for this is in the nightmarish Lecture Building. Simply port in, head to the Lecture Hall (you’ll need a key from the other side of the building the first time) and aggro all the slime professor type creatures inside. They should all stack right around the door (there’s a lot of them) and you can kill them all easily with some area of effect strikes. You can collect around 10-15 echoes per trip, and you can use a Moon rune to get even more echoes. Bonus – if your weapon supports it via gemming, turn it into a fire weapon – they’ll crumble in a single blow and it will speed up your farming experience. As if this wasn’t good enough, as the run takes less than five minutes, these things also drop a ton of quicksilver bullets and sedatives, so you can fill your bags up with these as well.
Besting The Beast Of Father G
The first encounter that could give you a hard time is Father Gascoigne. He’s fairly tough, even for a Souls veteran, as you’ll likely be adjusting to the new gun-parry into visceral attack. This involves landing a gunshot during specific frames of an enemy attack or recover that sets them up for Bloodborne’s form of backstab/critical strike. His phase three “beast form” can be absolutely devastating and kill you out of nowhere.
Before we do anything else, you’re going to want to collect the music box. Talk to the little girl in the window located up the ladder from the ogre staring at the door in Central Yharnam (not the one on the ground level, but the one located above the sewer area in the aforementioned blood vial run) and she’ll give you the box. You can use the box to stun Gascoigne earlier in the fight too, but he’ll transform to beast mode faster – and you do not want this.
To increase your chances of success, practice landing gun-parries and viscerals during phase one and two, and then use the music box on stage three in order to get a generous stun-window you can slash and hack Father G to pieces during. You can then throw some oil and Molotovs to finish the deal without ever getting close.
Bullets Forged In Blood
If you run out of bullets (and bullets power all kinds of things in Bloodborne, including the game’s take on “magic”) you can press up on the D-pad to create some blood bullets at the cost of health. This can be a lifesaver in certain situations.
How To Unlock The Cathedral Area
You’re going to need the badge from the messenger bath in Hunter’s Dream in order to unlock the cathedral gate, so save up 10,000 echoes for it as soon as you can around the time you defeat Father Gascoigne.
Check Old Areas Frequently
The game is full of time-specific encounters and situations, many of which will probably be unknown until players have time to log every location and time. For instance, once the moon goes into a certain phase you can go visit your friend Gilbert from the beginning of the game at the Central Yharnam checkpoint. Our poor friend takes on a wolf-like form and, sadly, you can off him for a special rune. If you get stuck and are just farming echoes, it’s worth going back and checking old areas just to see if things have changed.
Special Forms Of Healing Blood
At different points in the game, you can return to Iosefka’s Clinic and the Cathedral Ward to receive special blood supplies that can be used in addition to your blood vials as active heals. Iosefka offers a nice healing boost, but after you work on your “saved people roster” (talk to people by knocking on doors and directing them to the Cathedral Ward after unlocking it as a safe haven) you can acquire other kinds of special blood, including one that heals with a HP over time component and one that boosts stamina as well.
Branching Out From The Cathedral Ward
While you’re wandering around the Cathedral Ward area near Vicar Amelia’s boss room, there are two branching paths directly below her room. Going to the left will take you to Hemwick Graveyard, and going right will take you to two NPC hunters and a weird room where you may run into the Cthulhu-esque Amygdala. On a hill up from the NPCs, at some point a large enemy will spawn – a heavy hitter carrying a bloody sack. If you die to this enemy, instead of ending up at the lamp you will end up in a new area, the Hypogean Gaol.
As weird as it sounds try to find this creature and get killed by it. You will find lots of good loot there and it will become more important later in the game as well, and you can take on Darkbeast Paarl in this location to create a shortcut to the Blood-Starved Beast area.
I recommend going to the Hemwick Graveyard area as soon as possible in order to unlock the Rune Workshop (which essentially gives players ring slots to add defense, extra echoes from kills, resistances, and more). To unlock this feature, you must beat the Witch of Hemwick. Stay away from her summoned adds when possible, and keep looking for the blinking light during the early stages of the fight. She’s frail, but just when you think you’ve got the fight under control another witch will appear. If you take too long, the witches will actually resurrect each other. Clean them up as quickly as possible – just try to avoid all the stalking creatures and stun-missiles and move from corner to corner checking for the witches. They are only be visible when you’re close. After dispatching the witch, the key item can be found right downstairs.
Taking On The Tower
The hunter with the gatling gun in Old Yharnam can be a difficult battle atop the high perch. The easiest way to take the wind out of his stake-driver sails is to set him up for a visceral attack near the edge of the tower, which will send him flying all the way to the bottom – a much easier way to win than full-on combat with him. If you have trouble collecting the hunter’s loot via this method, come back and it should be waiting for you.

Chalice Dungeons
After defeating the Blood-Starved Beast, you’ll receive your first Chalice. Chalice dungeons offer content that is locked and can be tackled by single player or co-op, but also procedurally generated options that can only be created with online active. These offer a ton of content for players looking to group up and tackle encounters, so don’t ignore them.
Defeating Amygdala
In your journey through the Nightmare Frontier, you can actually take on Amygdala, the giant Cthulhu-spider thing you see all over the buildings in Bloodborne. You might run in and start slashing away only to be disheartened at seeing your blows add up to around ten damage. Fear not – Amygdala is weak to blows only in the head and hands, so attempt to position yourself accordingly. It’s not a difficult fight at all after you starting getting your swings into the critical areas.
Byrgenwerth’s Hunter Problem
The NPC hunter at the Byrgenwerth Mansion by the sea can be extremely annoying, having a wide variety of deadly attacks. You can do something like a “stair dance” by running up and down the stairs and charging up attacks to land right when the hunter gets to the top or bottom of the stairway.
Rom, The Vacuous Spider And His Beautiful Babies
Rom, The Vacuous Spider and his little spider minions have extremely tough frontal armor. During phase one of this encounter you can leisurely take your time and clean out all the spider soldiers – the best way to do so is to wander into range so they perform their jump strike on you and land a blow on their exposed backsides for full damage.
Once all the minions are cleaned out, lay into Rom. If you’re lucky, you can land a stagger during his attempted phase transition to tally some extra damage. During phase two and any additional phases, Rom will summon up another legion of spiders and begin actually playing by firing high damage ice shards at you when you’re at range and using a devastating point-blank area-of-effect attack and signaled spikes from the water when you’re close. The best way to deal with this phase is to play things fast and close, getting a few hits on Rom’s side and staying on the go to avoid lethal soldier blows and ice shards.
Mastering The Maze
The Micolash, Host of the Nightmare encounter will have you navigating a maze of fog while the cage-headed villain taunts you. During his first phase, Micolash is a real pushover, just go all in and start swinging as he runs to a side room. Stage two can be much more daunting, especially if you have trouble finding out how to access the gated room he hides in while all his playmates take swings at you. Go up to the bridge area (the bridge is not active right now) and step to the right side to get to a room where you can drop down. He’s down there, so prepare yourself and take a dive.
The second stage is significantly more challenging, and your best bet is to stay close and deal with his eldritch attacks and potent punches. If you let him get range, he’s going to cast a nightmarish Dark Souls-esque pile of homing soul-missiles that can deal insane damage. Pro tip – you can actually catch Micolash while he’s running if you’re really fast and get some extra hits in.
Unlocking Special New Weapons
If you’re hunting for the scythe weapon, it’s accessible by defeating the final boss if you select the “refuse” option in the burning Hunter’s Dream (along with a pretty fashionable set of gear). This means you normally won’t be able to access it until New Game +, but given how things go down in that ending and the fact there are many other areas to explore – there are likely multiple endings to discover (probably three). There are also some other really interesting and unusual weapons to find in NG+.
Popular Content


Get the Game Informer Print Edition!
Explore your favorite games in premium print format, delivered to your door.
- 10 issues per year
- Only $4.80 per issue
- Full digital magazine archive access
- Since 1991