Subscribe now to get our Invincible VS cover as your first issue!
How To Transfer Data From Your Old 3DS To Your New 3DS
Transferring between 3DS handhelds isn’t a particularly difficult process, but it can be intimidating and time consuming. Allow this walkthrough to help facilitate the process.
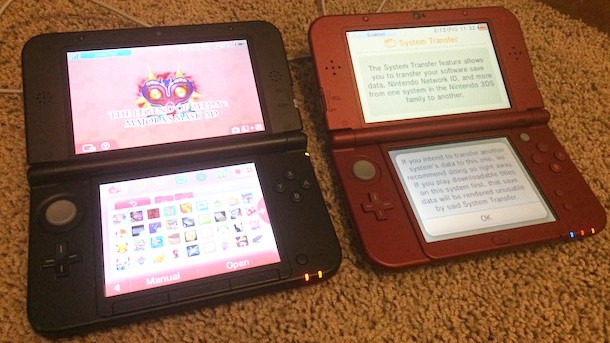
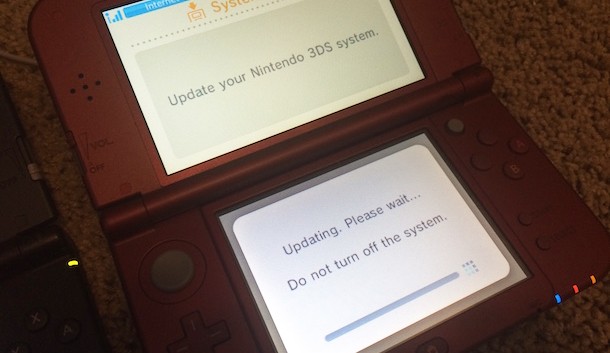
You may have gotten a New 3DS on Friday, and if this isn’t your first 3DS, it’s likely you will want to move your account, your downloaded games, and all your save files from your old 3DS to your new 3DS. The first thing you will want to do before removing memory cards or diving into menus, is to make sure both your old and new 3DS have the latest firmware. When transferring to my New 3DS, I had to drop everything to care or this first derailing the whole process.
Once you have both your 3DSs up to date, the next step is to back up your memory card. Take your SD card out of your old 3DS and copy all of its files somewhere on your computer. Your memory card houses all your eShop downloads and save files. Once that is complete, it’s time to copy all of that data into your new memory card.
Whether you’re using the 4GB microSD memory card included with the New 3DS, or opted for something bigger, you will need to access the memory card slot which is locked behind the New 3DS’ back panel. To remove the panel, unscrew the two small screws behind on the back of the New 3DS, and then use the small hook at the top of the New 3DS’ stylus to pry the panel off. You should see little indents on either side of the panel where the stylus’ hook will fit.

Once you have access to the memory card, copy all of the data from your computer onto the new memory card, insert it back into the new 3DS, and replace the panel. You should not need to access it again during this process. Don't delete the 3DS files from your computer as it will serve as a back-up, safety net for all your data in case anything goes wrong.
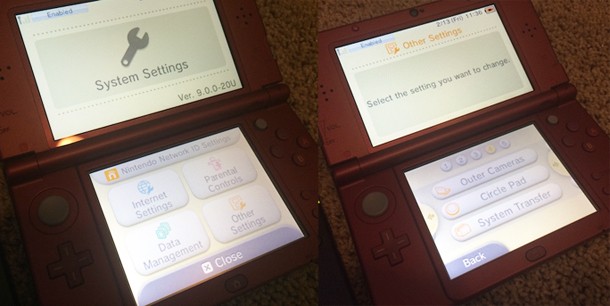
Now it’s time to do the actual transfer. Place your two 3DSs side by side and make sure they are both connected to your wireless network. In System Settings, go to Other Setting on both handhelds, and go to System Transfer.
And then head to page two.
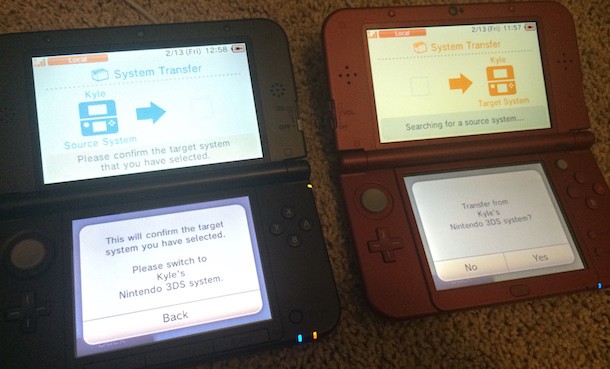
Set your old 3DS to send data, and set your new 3DS to receive data. It’s likely during this step you will have sign in with your Nintendo Network ID.
You will have to select the target 3DS from a list, which will likely only have one option on it – unless there are others trying to transfer 3DS data on the same wireless network.
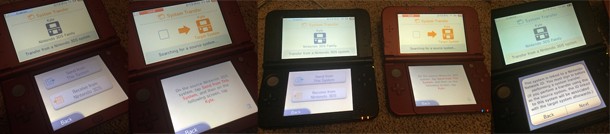
This is where things can become intimidating, as there is lots of red text warning you of possible deletion – but you’ve backed up all your saves, etc. to your computer, so don’t worry! This is the full text of the warning that appears on your 3DS:
The following will occur if you continue with the transfer:
- Data on the target system will be overwritten with data from the source system.
- The source system’s system memory will be formatted deleting all data
- Once performed, the transfer will not be able to be undone
- Time-limited downloadable content and downloadable content with a limited number of uses purchased on the target system will be lost
- Any software or downloadable content present on both the target system and the source system will be replaced with that of the source system, and the original target-system will no longer be usable.
- Data created by the target system on a microSD Card will no longer be useable (excluding Nintendo 3DS Sound recordings and Nintendo 3DS Camera photos and videos.)
- You will not be able to perform another transfer 7 days.
- Please not that turning off the system or disabling wireless communication during the transfer may result in loss of data.
When I transferred, I also got an alert saying some of the data wouldn’t come to the new 3DS. This ended up being a few DSiWare games (which fall under a different classification than eShop games for some reason) and I just redownloaded them after the transfer was complete. It’s possible you may not even see this alert.
The next alert you will see will appear on your new 3DS reading, “Perform a transfer without deleting the Nintendo 3DS data on the microSD card?” You will want to select “Yes” as we have already put our data on the new microSD card in the new 3DS.
To finish the process, head to page three.
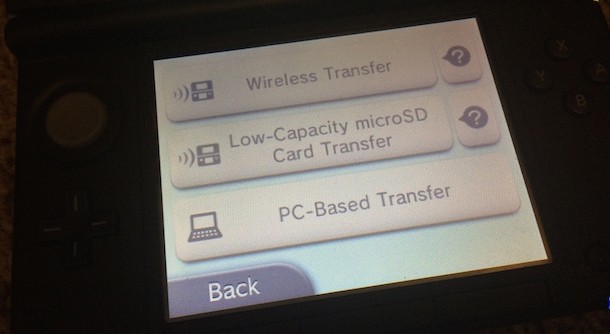
Next, you will be given three options and some details about them regarding how to transfer the memory card data. You can choose between a Wireless Transfer, a Low-Capactiy microSD Card Transfer, or a PC-Based Transfer. You will want to select the third option, “PC-Based Transfer” as this is technically what we have already done.
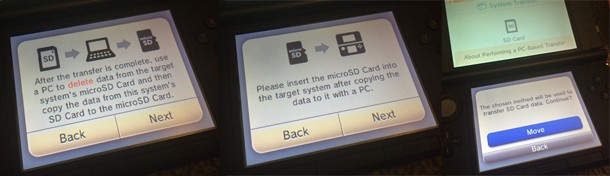
The steps you see below will then appear on your old 3DS, and as you have already taken care of this you can hit next twice and then hit “Move.”
Time to take care of this adorable time-consuming process. https://t.co/jz0aw1qtdH
— Kyle Hilliard (@KyleMHilliard) February 13, 2015
I saw an alert on my New 3DS at this point about DSiWare titles save data being transferred to my system memory. It’s possible you may not see this message as very few titles on the eShop fall under the DSiWare designation.
After that, you should be all set! Promptly throw away your old 3DS because… what else would you need it for?
Transfer complete! My old 3DS XL is dead to me now. https://t.co/v9ACySqIKA
— Kyle Hilliard (@KyleMHilliard) February 13, 2015
For our review of the New 3DS, head here.

Popular Content


Get the Game Informer Print Edition!
Explore your favorite games in premium print format, delivered to your door.
- 10 issues per year
- Only $4.80 per issue
- Full digital magazine archive access
- Since 1991