Diverging Paths: Tough Decisions With Lasting Consequences
Quantic Dream is expecting players to make difficult decisions with lasting consequences in their upcoming thriller Heavy Rain. In fact, every string of dialogue or button press will affect the fate of the title’s four main protagonists. And if you choose the wrong course of action—perhaps being a bit too pushy instead of a quiet observer—the character risks paying the ultimate price. From there the character, and all the subsequent plot points and perspectives, are gone for good.
Although we don’t see this level of permanence in games often, several recent titles have forced us to make choices that required no small amount of time to mull over. These games asked us to be the hero or the villain, to choose between forgiveness and revenge and to sacrifice personal happiness for the betterment of many. Each decision had its own unique reward or consequence, but it didn’t always make the end result any easier. So what were some of the toughest decisions we were asked to make in recent history? Read on to find out.
Warning: The subsequent entries involve explanations of major plot points in recent blockbuster titles. What does this mean? Watch for spoilers. You’ve been warned—no whining when we ruin Mass Effect for you. (Or Fallout 3, BioShock or Fable II, for that matter.)
Fallout 3: The Megaton Decision
Unless you decide to wander aimlessly about the Capital Wasteland, Megaton will be your first stop after venturing outside of Vault 101. Built around an undetonated atomic bomb from scraps of a downed airplane, Megaton isn’t quite a desert oasis. However, it’s an adequate watering hole, a prime shopping location and a hub to meet some very interesting people. It can even become a safe haven for you and your stuff. Or it can be reduced to a pile of rubble. The choice is up to you.
Early on in your Megaton adventures, you will come across Mr. Burke. Burke, working for wealthy Allistar Tenpenny, doesn’t much like Megaton and tempts you with its destruction. Considering the atomic bomb front and center in the city, it’s not that difficult to do. So what are you going to do, disarm or rig the bomb? With sizable pros and cons on each side of the spectrum, this scenario alone may warrant a second playthrough.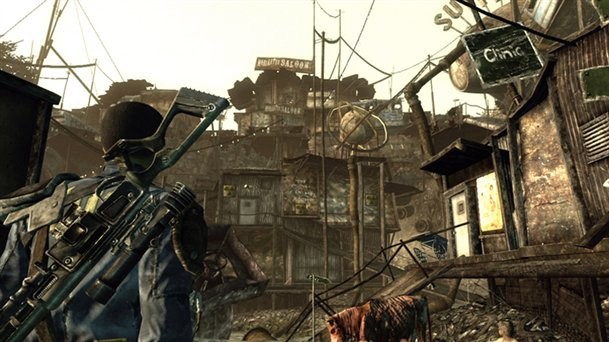
Disarm the Bomb: Megaton is one of the only reliable sources for weapons, ammo and medical supplies early on in the game, so your gut reaction may influence you to keep it around for an extended period of time. But there are other benefits as well. If you disarm the bomb, the biggest boost is to your karma and experience. The karma upgrade will also result in Megaton’s residents becoming enamored with you, some even randomly giving you free items such as ammo or Stimpacks. Additionally, the sheriff will reward you with a free house (see: shack), in which you can rest and stash all your stuff and a cap reward. (100-500 depending on your speech skills) Saving the town will also allow you to access hidden items, exclusive quests and more. Many of these quests and items are rendered moot if the city goes up in smoke. If you do decide to save Megaton however, watch your back. Let’s just say that Tenpenny and Burk don’t like being ignored.
Rig the Bomb (Power of the Atom): Obviously, if you accept Burke’s quest, the goal is to wipe Megaton from the map. This may seem like a dastardly thing to do—and it is. If you are striving for bad karma in this particular playthrough, this is going to be the fastest way to achieve it and gain an experience boost to boot. Bad karma will score you items from the slavers in Paradise Falls the same way good Karma will get you items from appeased Megaton citizens.
As for tangible rewards, you are given 500 caps (1,000 if your speech skills are up to snuff) and a suite in Tenpenny tower. Tenpenny tower is a relatively posh place that avoided the initial nuclear blast. But remember, if you decide to blow up Megaton, you risk the chance of missing out on items or quests that will become inaccessible with the location destroyed. Again, it’s possible to avoid this if you simply scour the town and finish all quests beforehand, but that leaves you homeless for an extended period of time. Blowing the city sky-high also nets you some enemies—Regulators and disgruntled former Megaton citizens—so you have to watch your back with either decision.
The explosion is pretty though.
BioShock: Rescue or Harvest?
Despite their eerily glowing eyes and ghoulish faces, it’s tough to look at one of BioShock’s Little Sisters and consider harming a hair on their impressionable heads. But 2K Boston didn’t make the decision to rescue or harvest Rapture’s smallest residents an easy one, even though there isn’t really much debate about the morality of the situation. Really, who kills innocent little girls for a power boost?
Still, the motivations are many. The primary deciding factor for most was the reward of an alternative ending. Harvesting all, some or none of the Little Sisters resulted in three different conclusions to Jack’s adventures. One will make you feel all warm and fuzzy inside, with the remaining two resulting in a notably less cheery outcome. So who do you listen to, Atlas or Dr. Tenebaum?
Rescue: Aside from the “warm and fuzzy” ending, there is an achievement for rescuing all the Little Sisters in the game. “Little Sister Savior” will net you 100 achievement points for your uphill struggle. The tradeoff is that you don’t garner quite as much Adam-required to purchase plasmids used in battle—if you decide to rescue the Little Sisters instead of harvesting them. But the loss is nearly equalized whenever Dr. Tenebaum leaves you a gift in the Gatherer’s Garden—generally a gift for every three girls. These gifts house items such as health packs, plasmids and even bonus Adam. There are even exclusive plasmids, such as “Hypnotize Big Daddy,” which allows you to temporarily recruit one of the hulking baddies to aid you. In the end, the Adam is nearly all there, you just have to wait longer to get it.
Harvest: So what if you are impatient? Then harvesting is the way to go as it will give you a frequent boost to your Adam stock. Getting more Adam sooner may help you open up new abilities early in the game, but aside from that, the experience isn’t much different. Until you get to the ending. And your soul starts to corrode as you are faced with your decisions. If the morals don’t matter, you will still get a small reward after you have “dealt with every little sister.” The result is a 40 point boost to your achievement score for harvesting or rescuing every little sister in the game. It’s something to fill the void.
Fable II: The Needs of the Many, The Needs of the Few or The Needs of the One
This particular set of decisions left many motionless—unable to decide what to sacrifice at the end of a very long journey. After gathering the three heroes and combining their power to halt Lucien’s plans for the Tattered Spire, Sparrow was faced with an impossible choice; the needs of the many, the needs of the few or the needs of one.
The Sacrifice (The Needs of Many): The recent years haven’t been easy on anyone. Many died at the hands of Lucien after being forced to help build his spire. Choosing “The Sacrifice” will bring back all of the people that perished during Lucien’s rein—a number estimated to be in the thousands. The catch? Your family and beloved dog won’t be found on the roster of the returned. If you choose this option your place in history as a hero is solidified and a statue is erected in your honor. It’s what any selfless person would do after all. But otherwise, gameplay isn’t much different. While all those that died building the tower have been revived, you never actually get to see them. But we bet you will notice the absence of your four-legged friend and family. This decision results in a positive moral standing for your hero.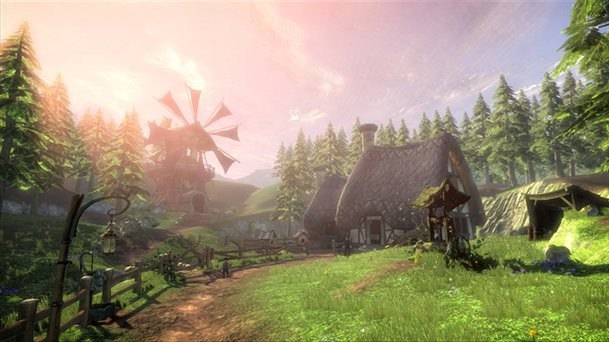
Love (the Needs of the Few): Perhaps you deserve a brief respite from the toils of your adventure. You did just save the world after all. If the idea of being without you family and your canine companion is too much, Love may be the best choice for you. You’ve sacrificed enough, right? Funny enough, for many the idea of losing their spouse and children wasn’t the deal breaker. The dog was. Considering that the dog is an essential element of gameplay, the idea of roaming the streets of Bowerstone alone may be too much to handle. It was for us. This decision has no moral standing on your hero.
Wealth (The Needs of One): If you have tossed any feelings of sentiment aside and believe you will do just fine without your family and friends, Wealth is in your future. Gold and riches beckon you, but you must sacrifice bringing anyone back from the great beyond. The choice nets you one million gold, which is enough to invest in the most prestigious property in Bowerstone—Castle Fairfax. Obviously your moral standing will take a hit, so good luck finding villagers willing to visit you in your cavernous new abode.
Of course, you can always do what we did and save just before the final encounter and choose each option in succession to nab the three 25-point achievements. But ultimately you have to live with one decision if you intend to keep playing.
Mass Effect: The Council
The team at Bioware takes the ramifications of player decisions in their games quite seriously. So much so, we have been promised that the choices made in Mass Effect will carry over to the next iteration. And we expect one decision in particular will cause plenty of ripples when Mass Effect 2 hits retail.
This is a tough one. When the massive ship Sovereign, aided by a hostile Geth fleet, are heading directly for the Citadel and the Council members within Shepard must act fast. Blasting his way to the top of the Citadel tower, Shepard is able to buy a small amount of time and make the aggressive ship vulnerable to attack—but only briefly. Now he must make a choice. With only enough time to execute one option, Shepard must choose between issuing the command for the Alliance to save the three elected representatives of the Council, or to attack the Sovereign in its moment of weakness. Either way, eventually Sovereign is destroyed, but the players decision has some major consequences.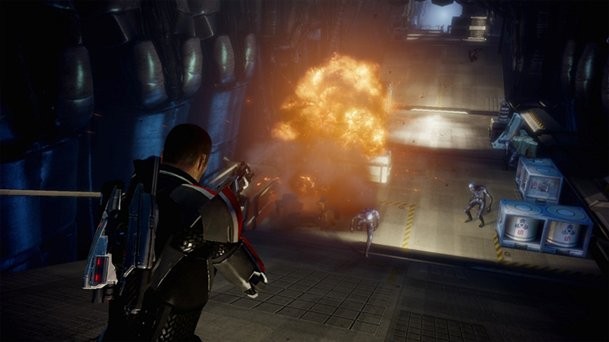
Save the Council: If Shepard saves the Council, they become pleased with his bravery and transpose his merit onto the human race, granting them a seat on the Council amongst themselves. This is a democratic act and a process done with open arms.
Exploiting Sovereign’s Vulnerability: If Shepard instead chooses to go after Sovereign directly, the council perishes as a result. This leaves no choice except for the Systems Alliance to step forward and take control. Now, instead of being elected to a position on the Council, Humanity becomes an autocratic ruler. Democracy is bypassed entirely.
The exact ending depends on a few other factors—weighing in on Shepard’s Paragon and Renegade meter levels. But with either outcome, Shepard must also choose between Uldina and Anderson to represent humanity in it’s new direction. You can bet that both decisions will play out in Shepard’s next adventure.
Get the Game Informer Print Edition!
Explore your favorite games in premium print format, delivered to your door.
- 10 issues per year
- Only $4.80 per issue
- Full digital magazine archive access
- Since 1991
