Please support Game Informer. Print magazine subscriptions are less than $2 per issue
Our Sacred 3 Survival Guide
As I mentioned in my review for the game, Sacred 3 is bound to be a divisive game. For people who dive into it based on the title alone, it could potentially be one of the more disappointing releases of the year. It’s not a Sacred game in the traditional sense. The third numbered entry strips away the open world and shuts off the loot shower from previous entries – understandable deal-breakers for people who love to explore. After I came to terms with what the game is, and let go of what I wanted it to be, I had a lot of fun with it. If you’re planning to dive into the game, here are some tips that will make your adventuring more fun.
I spent time with each of the game’s four characters during my time with Sacred 3, but I gravitated toward Claire, the Seraphim paladin. I liked the Seraphim class in Sacred 2, and ultimately I enjoyed her balance of speed and attack power here. Each of the classes is ultimately viable, however, whether you’re playing solo or attacking evil in a group of four. Here's a quick breakdown of each one:
- Alithea is an Ancarian lancer, who uses polearms. Thanks to her choice in weaponry, she’s able to attack enemies at a reasonable distance, damaging them before she has to worry about smelling their hot breath. Characters have basic attacks, as well as unique abilities called combat arts. Alithea’s earthquake combat art is great, allowing her to unleash a quick flurry of attacks that continue to cause damage as long as her energy holds up.
- Claire, the aforementioned Seraphin paladin, has a sword. Claire’s quick on her feet, allowing her to engage enemies, slash them into ribbons, and then move on to the next target (or get away if they’re still alive). She also has a nice variety of combat arts that are based on lightning. I relied on her chain lightning and tempest combat arts, and never looked back.
- Vajra is a Khukuri archer, which means you’re going to turn enemies into living pincushions. His combat arts are focused on the cold, allowing him to freeze and slow enemies – giving him time to reposition himself when foes get too close. He starts off with a nice piercing shot attack that lets him break through shielded enemies’ defenses.
- Marak is a Safiri warrior who uses solar attacks (and a big mallet) to leave his mark on the world. He can take a lot of damage, and his slow-moving weapon dishes it out in turn. He’s probably the most straightforward of the four characters, and he’s a great pick for players who want to run toward the nearest moving thing and kill it.
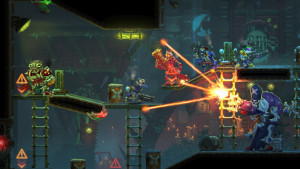
The tutorial mission does a decent job of driving home the basics of combat, but there are a few things that I don’t think can be overemphasized. First, the bash move is critically important. You’ll use it to temporarily stun shielded brutes, and its charged version can be used to disarm traps from a distance. As you progress, you’ll encounter magic-using enemies that will be tremendous pains until their spells are interrupted by using – you guessed it – bash. Get in the habit of using it from the start, and then whenever you see a bad guy with a suspicious-looking icon over his head, countering it will be second nature.
There’s a roll button, and you’re going to want to use that a bunch as well. If you’re like me, it’ll quickly become your default way of moving through the world, simply because it looks so goofy. It’s also useful. It’s an effective way to get past environmental hazards quickly, and it should be your go-to maneuver when you’re in the thick of combat. Until you beef up your weapons, brutes aren’t necessarily going to go down the first time you attack them. When they’re upright again, get ready to roll out of the way and prepare to bash them again. Or, when you finish off an enemy, use the roll to quickly get into position for your next attack. (More on that on the next page.)
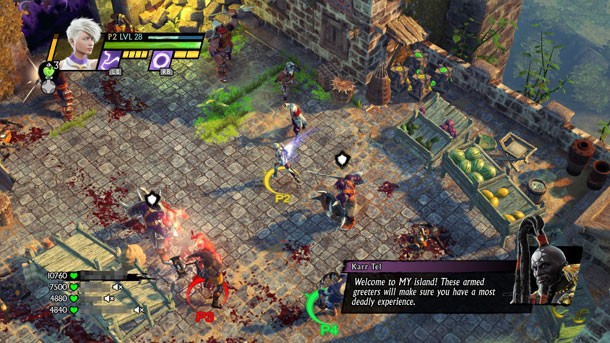
Resist the temptation of rolling over to enemies that are on their backs and giving them one final poke. Either they’re dead and you’re wasting time, or the indicator for the execute maneuver hasn’t quite popped up yet. That execute move is, without question, the most important part of succeeding at the game. When an enemy is flagged with it, pressing a single button will cause your character to launch into the air (over a pretty silly distance) and strike down the foe with a single blow. Performing several executions in rapid succession builds up a meter that lets you deal more damage, while also increasing the odds that your fallen foes will drop extra gold and restorative items.
Executions are remarkably versatile because of the ridiculous distances that the characters can travel to perform them (I won’t fault their enthusiasm). You can – and should – take advantage of what is essentially teleporting. It’s a great way to dive into a herd of enemies, and, just as important, you can execute a far-flung opponent to get yourself out of danger.
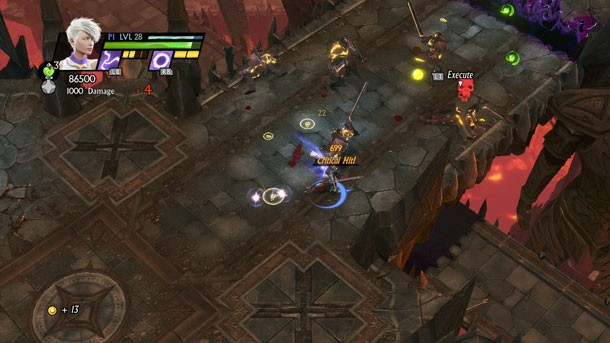
When you’re facing some of the game’s larger opponents, you’ll occasionally get the opportunity to use a power move on it. Take it. Pressing the corresponding button starts a button-mashing sequence where, as long as you’re jamming on the button, the big bad is temporarily stunned. If you’re playing multiplayer, this is where your friends can jump in and get some free swings on the jerk. Even if you’re playing solo, use the power moves. They whittle away health, and nearby enemies will patiently wait until it’s finished to resume their attacks – even ranged fighters. Unless you’re standing on a trap or something else that does AoE damage, there’s no downside to using power moves every time they’re offered.

Loot may be gone, but you will pick up battle shards as you work through various missions in Ancaria. These provide a variety of bonuses (tempered by penalties), though their usefulness really does depend on how you play. I found the following three to be particularly helpful.
The Demoness sets enemies on fire when you attack them, at the expense of incurring additional damage to your own character. By the time I acquired her, however, my armor had been leveled to the point where the negative aspect didn’t make that much of a difference. The Gladiator is a great pick when you’re starting out, since it increases the amount of damage that you output when your health is low. That shouldn’t happen regularly, especially if you’re bashing and executing fools like a maniac, but it’s a nice safety net. The Vampire is easily my favorite. She converts a fraction of the damage you deal as health, with the tradeoff being that you don’t recover as much health from restorative agents. That doesn’t matter. Once I equipped her, the Vampire allowed me to be even more aggressive than before, with the damage I’d take from larger enemies almost immediately being offset by the bonus health. It’s a little broken, but I’m not complaining. She’s also not nearly as annoying as some of the other battle shards; each one provides their own audio commentary, and some are terrible.
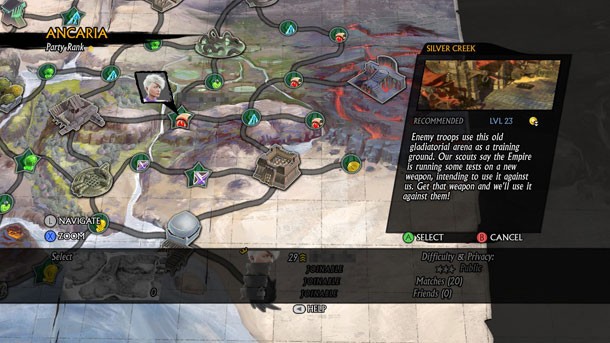
Open worlds are a no-show in Sacred 3, along with a larger sense of discovery. There are hidden chests that you’ll find by going (slightly) off the beaten path, but they’re generally not worth going out of your way for. They only contain paltry amounts of gold and restorative items. Do the side missions instead. In particular, the star-shaped one in the picture above will give you the smart-bomb item, and completing the missions leading up and to the right (with the red icons) will increase your carrying capacity. Smart bombs are handy, and you can easily tackle the missions that center around the item even if you’re seemingly underleveled. By the time you open them up, you should have access to a bunch of health potions and other life-extending items. Use them liberally if you have to; you can always buy more.
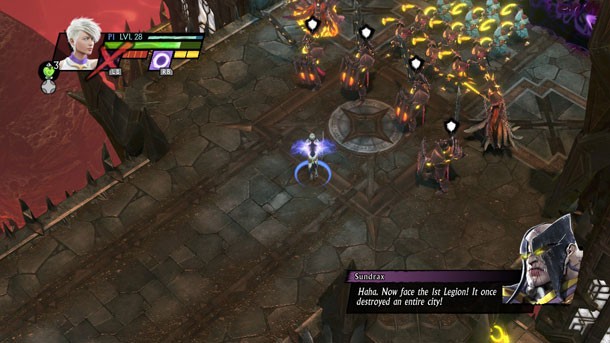
And without getting into spoilers, the final boss is a pain if you try to engage him. Let him do his stupid thing, and then deal with him when he comes to you. You’ll understand what I mean when you fight him.
I’d like to ask you to support Game Informer’s continued coverage of games with a subscription. For less than two dollars per issue, we mail you a full year of 10 print magazines, each with cover stories and preview features filled with exclusive details about the most exciting upcoming games. We profile and interview game creators. We look back on the rich history of gaming, and we celebrate what’s next.
Here on the website, we offer much of our content for free, including game reviews, daily news, videos, event coverage, and more – all with minimal ads.
We do so with a small editorial team, alongside contributing paid writers from around the world – over 65 individuals from 9 countries around the world, just in the last couple of years.
It’s not possible without support.
In a time when game makers and games coverage have faced hard struggles and layoffs, the future of this 30+ year magazine and community is at risk. Our new standalone magazine subscription is the number one way you can keep us alive – and we believe you’ll get a pretty fantastic gaming magazine in your mailbox every few weeks for your trouble.
Thank you.