Subscribe today to get the first appearance of Dragon Quest on our cover!
37 Tips For Monster Hunter: World Newcomers

Monster Hunter World has finally arrived onto consoles. Given that this is the series’ first time on a non-portable console in ages, there’s going to be many people coming to the series for the first time. Monster Hunter is a complicated game with a lot of features and systems interacting with one another, and it doesn’t hold your hand. Instead, it drowns you in tutorial windows and then lets you fend for yourself like a proper hunter in the wild. While there’s something to be admired about this design, new players may be intimidated.
Hopefully this guide, put together by the G.I. Monster Hunter: World crew, proves useful to you.
Combat & Character Builds

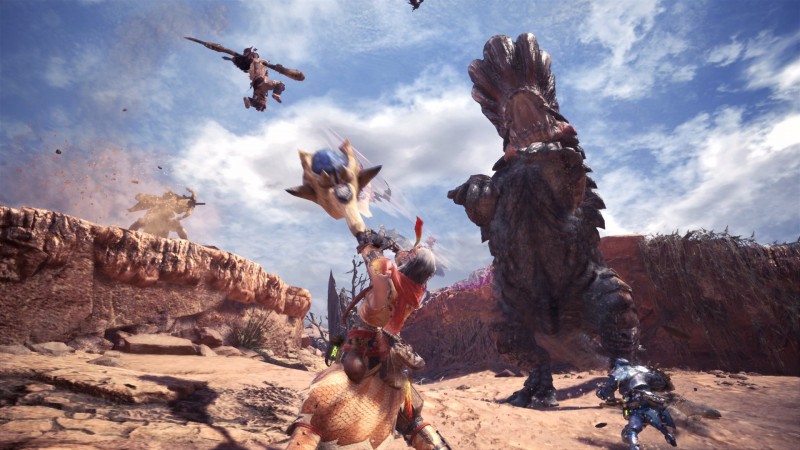
1. The monsters you hunt are complicated beings, and you shouldn’t think of these encounters as hack-and-slash affairs. Each hunt is essentially a boss fight, with every creature having its own patterns, strengths, and weaknesses. It behooves you greatly to learn about each creature you hunt. Tracking footprints and looking at your monster guide will help you, but ultimately the most valuable lessons will come from observing their behavior.
2. Monsters do not have health bars. Instead, you need to pay attention to their behaviors. The longer a fight goes on and the more damage you deal to the beast, they’ll start behaving differently. Look for limping or pauses in combat where the creature takes several breaths. Eventually, most monsters run away, forcing you to chase them. A tell-tale sign that a creature is about to die is that it’ll take a nap to restore life. This is when you go to town on them, hitting as hard as you can.
3. Understand your weapon. This is way more than just movesets, especially if you're using some of the more advanced choices. Every bowgun for instance, can use a different ammunition loadout - some are designed to be sniping and debuff machines, others can perform like shotguns or artillery support batteries. And they have special sockets too, that can be tweaked for recoil, reload time, and damage at different ranges. That's just one example - make sure you take a little time to examine all the possibilities and potential behind each weapon before taking it into a serious fight!
4. Hunt in packs. You can use SOS Signals and invite friends to your hunt if you’re struggling with a monster. During campaign missions, you’ll often receive a message saying you can’t send out a flare until you watch that mission’s cutscene. Once the cutscene plays, you’ll get a notice saying you can send out flares and get other hunters to lend a hand.
5. Don't forget to sharpen your weapons during battle. The duller your blades get, the weaker they become. A good strategy is to wait until your Palico is distracting the monster or the monster is running away to sharpen.
6. Traps are craftable items that can change the course of a battle real fast. Pitfall traps and electric traps both ensnare enemies and put them down for a few seconds. That might not sound like a lot of time, but it’s a big enough window to get in several hits on an enemy's weak spots. Make sure you use them.
7. If you hit enemies at certain points on their body, like tails or horns, those points will break off. Not only does this wound the enemy, but it often prevents them from using one of their regular attacks with that body part. It also turns that body part into an extra crafting material, so be sure to pick it up.
8. Palicos don’t do much damage but they are useful as a distraction, especially if you’re trying to solo a new monster. Often a good strategy is to wait until the monster in question is fixated on your palico and then dive in to attack them once or twice before running away.
9. Don’t fret too much if you lose a battle. You get three attempts on every hunt.
10. Your slinger doesn’t do much damage but it can be useful for getting a monster’s attention or interrupting its attack animation.
Resources & Crafting

11. Always be crafting. The best place to craft is in front of your item box, so you can combine items both in your item box and your pouch. Speaking of your pouch….
12. Always think about what you need to be carrying. You’ll be looting environments of their berries, seeds, and other goodies a fair amount. If you’re a melee class, there’s no reason for you to be carrying ingredients for blowgun ammo, so dump that as soon as possible for stuff you can use in the field.
13. Equipment is essentially the only way to level your character, so check in at the workshop a lot and upgrade weapons when you can. Don’t feel the need to craft every piece of armor you see. If one armor doesn’t strike your fancy, you can easily use those materials to craft something for your Palico.
14. The Resource Control center (directly in front of the main gate in the trade yard in Astera) is useful for both turning in quests and receiving them. These quests are often hunt/kill/capture a certain monster, but they also have rewards attached to them beyond the monster’s hide (usually rare bones or materials). Be sure to check in at the center often to obtain new quests.
15. When you’re mining, foraging through a bone pile, or carving off chunks from a defeated monster, you don’t have to press the circle (or A) button each time. You don’t even need to tap it. Hold the button down, and your hunter will continue to mine/forage/carve until the node is depleted.
16. Get in the bone zone. It seems like a classic Catch 22: You can’t beat monsters without protecting yourself with armor, and you can’t craft armor without the parts you get from defeating monsters. Right? Not really. If you’re looking for a solid, versatile armor set that will take you from the early to mid-game hunts, the bone armor is a good bet. You can forage most of the pieces from bone piles, which are scattered throughout the world. It provides nice resistances against fire and dragons, which are two things that you’re going to run into a fair bit. Feel free to mix and match with other pieces, if you want, but bone armor is a great starting point.
17. Don't miss out on town upgrades and the associated quests. It can be easy to skip over optional content especially if they task you to kill dangerous creatures that you don't even need parts from, but it's worth the effort. A fully-functional harvest bin to churn out consumables for you is well worth the effort. Other town upgrades are handled automatically as you progress, but still are worth your attention. Don't miss the melder to create rare items and gems, the ship captain for rare item packages from the mainland, and your Palico crew to collect materials from hunts that you've already conquered. Why go back and farm lower tier monsters when your cats will take care of it for you?
18. The Botanical Research center becomes accessible after a few hours into the storyline. This lets you grow agricultural resources, like honey and herbs, which can be used to craft useful potions. Be sure to stop by every now and then to cultivate ingredients you need.
19. The town of Astera offers a lot to do, and it’s easy to overlook one important task. The Meowscular Chef is the cook in charge of the cantina, and he’s rooted to his post. As such, he can’t wander the world in search of important ingredients. That’s where you come in. Check your map regularly for a yellow exclamation point near the cantina icon. He has a string of tasks for you, particularly in the early hours of the game. These can pile up if you’re not paying attention, and they’re all worth completing. You’ll have to find the ingredients for him, but the results are well worth it in the form of better meals with higher-quality buffs.
20. The Elder Melder is great for combining items you don’t need to create valuable items (like ancient potions, which are extremely useful with endgame monsters). This shop becomes available about halfway through the game. Use it frequently. Just make sure you’re not giving up any valuable materials by accident.
21. Another resource you get access to later in the game, The Argosy, is a cargo ship that brings in shipments of items every few quests or so. You can customize the randomized items you receive into categories (like materials or consumables). These items are a crapshoot and cost a fair amount of research points, but it can be a useful resource if you have a surplus of points.
22. You can farm resources from certain areas by fast traveling back to a camp, which makes the whole area reload. This is particularly useful for farming both honey and bone piles.
23. Set bonuses are important, and you can mix and match them to create potent and focused builds. Be aware of how many pieces are required to trigger a set bonus as it varies from set to set. Even though it may be more stylish to rock a full set from one monster, it may be to your advantage to combine several.
24. Speaking of sets, are you dying for more pieces of a monster like those hard to find tails, gems, and other rare bits? Investigations are the key. Rather than going through the same optional mission from your list every time, examining tracks and slaying monsters will unlock investigation opportunities in town. These offer more interesting takes on classic hunts - taking on more than one monster, doing something within a time limit, restricting the number of knock downs the player can endure, restricting the number of hunters that can participate, and more. However, the rewards are far superior than a vanilla mission, and often come with additional rare drop incentives. For some of the more threatening monster investigations that you discover in the endgame, these include valuable and rare decorations that can be used to enhance your powers even more. Don't hit up the quest list and farm the "story" or optional mission every time - delve into investigations for a lot more efficient farming.
Exploration

25. Your scout flies are your best friend, even more so than your furry palico. They’ll highlight nearby resources, footprints, and will lead you to markers you place on your map.
26. You get research points for tracking footprints, finding valuable materials, and cutting parts off monsters. These points are a secondary currency that can be used to buy valuable items back at Astera, so track footprints whenever you see them, even if you don’t need them.
27. Look for footprints, which lead to creatures you might be hunting. Once you find a creature, you can open up your map and stick them with a pin. This means if they run away from battle (as they are wont to do) you can track them wherever they go on the map.
28. Once you find a resource on the map, like a certain plant, that resource will be etched on your map forever. Return to these places to farm this particular resource.
29. Look for environmental hazards, such as quicksand and vine traps, that you can use to your advantage during battles against bigger monsters before engaging them.
30. Every area you explore has unique resources, usually in the form of bones. Missing some coral bones you need for a cool suit of armor? You’ll find them in the Coral Highlands, for example. Be sure to explore every locale if you’re missing certain crafting materials to figure out where they grow or can be mined. It’s the only way you’ll be able to craft higher-end armor.
31. There are secret, mini-questlines hidden in each locale. Completing these small quests gives you access to helpful resources, like a temporary extra Palico. These questlines are extremely helpful, bordering on necessary, if you’re trying to solo the game.
32. Most missions are timed. Try not to let the timer get to you. For most story missions, you’re given more than enough time to find the beastie you need and slay them. Just pay attention to the prints you’re tracking and the monster’s attack patterns.
33. Don’t forget to fast travel to camps! There’s no penalty to this and it can be useful. For example, if the monster is far away from you, but you know they’re near a camp, it’s worthwhile just to zip over to the camp to save time.
34. Explore! Some of the most important unlocks like Palico tribes, gadgets, and other helpful boons can be done during expedition mode. This will also give you the chance to catch some critters to put into your house, learn the benefits of fishing, and more.
Endgame

35. After you get to high rank and beyond, sets often come in several different varieties for each monster. Selecting one option gives you a few skills on a single piece of armor. The other option will give you one skill and a decoration slot so you can augment the armor as you please with your own gem to enhance the skill of your choice. While the first option is often better as you are assembling a collection of valuable decorations, later on you may wish to swap one or more pieces to the alternate set to create a customized build that really shines.
36. While many of the end game encounters can be dealt with via a war of careful attrition - even most of the Elder Dragons - you won't be able to escape combat for the final campaign encounter. Therefore it is essential to make sure you have all your consumables ready to go before going into that final battle, as you will not be able to change areas and find respite. If you get knocked down, you will have a chance to go back to your tent to resupply, but you can't break out of combat once you're engaged.
37. Elder Dragons present a more significant challenge than other monsters in the game, but offer great rewards, including the best armor and weapons currently available. They often have "one hitter" abilities that are telegraphed and punish a player severely for getting tagged. Don't get tagged, and study the monster behaviors to find openings. There are often other fight mechanics involved that present challenges not found outside of these battles, like horrible afflictions or point-blank-area-of-effect explosions. If at first you don't succeed, ensure your armor is fully upgraded, that you're using appropriate consumables, and that you have the environment mapped out to your advantage. Many areas, including the "final boss" area, include areas where you can get some serious air time - perfect for escaping and jumping down onto the big bads. If you're not using weapons or tools that help you pull off aerial plays, you should still be looking for opportunities - even a slight incline or dip in the terrain could allow you to perform a slide-jump.
For more on Monster Hunter: World, be sure to read our advice for how to solo the game.

Get the Game Informer Print Edition!
Explore your favorite games in premium print format, delivered to your door.
- 10 issues per year
- Only $4.80 per issue
- Full digital magazine archive access
- Since 1991


