Please support Game Informer. Print magazine subscriptions are less than $2 per issue
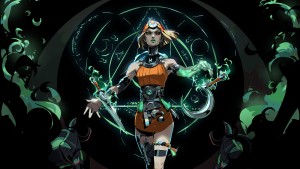
Your Guide To Bloodborne: The Old Hunters

The Old Hunters is a challenging block of new content that complements the core game nicely (read our review here) – most of the content is clearly meant to be undertaken by higher-level characters, although you’re free to enter the Hunter’s Nightmare shortly after besting Vicar Amelia, which is fairly early on. Warning: This article has spoilers; it’s a guide after all! So stop reading now and go get destroyed by Miyazaki’s mad creations if you want to go in blind. My playthrough of the new content was with a melee centric-build that used new weapons like the Boom Hammer, Whirligig Saw, and Arm of Amygdala, so your mileage may vary as you tackle the challenges with the new batch of armaments.
What The Heck Are The Old Hunters?
The old hunters are a ragtag band of vermin-smashers that function as both a “covenant” you can rank up with and special companions that can be called in for one point of insight to help you tackle bosses. The latter is especially handy for single-player or offline assistance. Their call-in red bell spots are usually easily visible from boss fog gates. However, most of them don’t hit very hard at all, and they almost always end up being eaten by the more powerful adversaries, so don’t count on them too much. You can find the leader of “the league” of Old Hunters at the entry point to the Forgotten Woods, inside the first shortcut elevator area. Talk to him to sign up and become a member of the league, and maybe someday you too can be a bucket-wearing badass with a whirligig saw.
How Do I Get To Old Hunters’ Expansion Content?
It’s not that tough. First, you’ll have to beat Vicar Amelia. After that, head back to the Hunter’s Dream. There should be a little pool of messengers with a new item for you: the eye of a blood-drunk hunter. Take it. Now head back to the Cathedral Ward lamp, hang a left out the door, and find the tree where that silly Amygdala would always grab and kill you. With the eye item on your person, get grabbed by the creature (you won’t be able to see it without 40 insight, but don’t worry, it’s there). Just hang out by the tree(s) until you get caught, and from there you’ll be thrust into the Hunter’s Nightmare.
What’s In The Hunter’s Nightmare?
First off – The Hunter’s Nightmare will be a serious challenge for anyone wandering in after taking out Vicar Amelia. There are a ton of incredibly difficult enemies and traps that will seem like mini-bosses or even bosses for a fledgling character. However, that doesn’t mean you shouldn’t dip your toes in early. If you’re an adventurous runner that’s not afraid of dying, it’s fairly easy to unlock the first few shortcuts and lamps by running around and not engaging the many lethal threats. Why is this important? Loot!
A number of expansion weapons are lying around in the first area; all you have to do is pick them up off the ground. You can collect the Boom Hammer, Arm of Amygdala, Beast Cutter, and the Whirligig Saw this way, just in this first zone, all by running around like a madman. And you’d have to be mad, once you see how hard these creatures hit.
There are other things you don’t want to miss here, like a badge off a crazed werewolf and a gatling gun, but it’s best to come back when you’re a little more experienced to pry those off their unwilling owners. You also need to make sure to stop by the chapel on your way up – the place that looks like Vicar Amelia’s abode, with a giant door that opens and contains a huge octo-monster. Run by him if you need to and grab the item from the teeming mass at the end of the room. You’ll need it later.
Taking On Ludwig
I found Ludwig to be the easiest boss in the expansion. It makes sense; he’s also the first. At around halfway through Ludwig’s lifebar players are treated to another cutscene, where the crazy horse-beast-man-thing busts out the Moonlight Greatsword and starts going to town with it. It’s deadly at both close and long range, but Ludwig’s windups make him fairly vulnerable and easy to deal with. You can take this guy on at a relatively early level, provided you’re a skilled player – and he’s easier than the hunters and monsters outside in the Hunter’s Nightmare. After you slay him, his head will remain. You can talk to it, and if you come back here later during your adventure, you can pick up the Moonlight Greatsword for yourself off the dying head. It’s pretty awesome.

The Chapel In The Nightmare
Between Ludwig and the next area there’s a brief crawl through an underground tunnel. Many of these doors are locked, including the one that leads to the Church’s assassin (who has a really cool piece of headgear you can pick up later). For now, avoid or kill the two assailants in the hallway and move up to the next area, where there will be two deadly, aggressive NPCs. If you’re equipped and skilled enough, you can take them on now (I recommend dragging the melee NPC into the hallway below to avoid the caster’s blasts and then moving on to her), but if you just want to proceed move up to the alter and trigger the cutscene with one of the items collected earlier. You’ll be moved up to the next area. It’s important to note that you can come back here later to both clean up these two NPCs and collect a special item from the altar – one that will unlock a special boss. Also note that you can ride this "elevator" down to collect a pretty spiffy gun.
The Research Laboratory
This place is a Miyazaki multi-floored stairway-swapping nightmare maze, and you’ll have to navigate pitch-black rooms full of extremely dangerous patients, exploding hospital accessories, and patients violently assaulting you with anything not nailed down. The Research Lab can take some time to unlock, and be sure not to miss the key to underneath the chapel back through the hallway you came through when you’re exploring. The key will open most of the doors downstairs in the tunnel, including one that contains a poor fellow smashing his head into a wall. After you discover him (or kill him, I’m not sure. I killed him. He drops a fire resist set and I could still ring his bell, so looks like I win) he can be called upon as an Old Hunter.
During your trek through the Research Lab it’s also important to find small brain jellies that will talk to you. Smash them. Bring their brain juice to the character that you’ll meet in one of the shortcut locations, and she’ll hook you up with some nice blood (you can repeatedly get one of these special blood vials as long as you’re not carrying one).
Eventually, you meet the boss of this area. I don’t know if this is a build problem, but this boss – The Living Failures – gave me a rough time. These astral mishaps will continue to spawn in a flowered pen, you can use the middle for cover. That particular bit of information is essential, as these creatures at range will fire both enormous astral balls and homing missiles at your person. This wouldn’t be so bad, but their melee attacks – a multi-swing and a powerful headbutt ¬– are also absolutely lethal. Try and isolate the Living Failures on one side of the flowered middle to keep only one or two “on you” at any given moment. They continue to spawn until they run out of life no matter how many you kill or how fast you do it, so always be prepared. Around half HP, the Living Failures pull out their gimmick – calling down meteors from the sky. Roll like crazy around the now familiar “plant pot” in the middle (you can also sneak a few swipes in here while they go into “call down” mode) but do be careful; a few of these rocks crashing into you is almost certainly game over.
To The Clock Tower
After defeating the Living Failures, you can open the door behind them. No level to push through here, just another boss ready to go. This is Maria of the Astral Clocktower, and if you enjoyed the Gehrman fight you’re going to love this one. This character reminded me a lot from something out of say, Vampire Hunter D. The battle is similar to the “hunter vs hunter” frantic encounters that should now be somewhat familiar to the player – lots of zipping around anime-style and trying to get whacks in. Maria originally starts out as a simple physical assailant, and undergoes two transitions that make the fight substantially more fast-paced and difficult. First, Maria will pull out blood attacks, including stylish slashes and even a blood “cannon” attack that can hit you from long range. Later, Mira will add fire to the blood, and the whole thing becomes a surreal and incredibly stylish experience. This is my favorite boss encounter from the expansion, although not the most difficult. After you defeat Maria, you can purchase the Mira set from the insight pool back in the Hunter’s Dream. You also gain the item to unlock the giant clock right in front of you, so do it.
The Fishing Hamlet
Yep, it’s right out of Lovecraft. Here we are, in Miyazaki’s version of The Shadow Over Innsmouth. This is one of those “small” large zones, featuring multiple lamps and a number of shortcuts. Once you get to the second lamp you’ll find a corpse that contains a cool weapon and the key to the final room in that underground passage near Ludwig. You can go back and deal with the Church Assassin now or simply push forward. I would highly recommend exploring this place thoroughly despite the huge lumbering fish things that can pummel you into mist, as there are some choice gems and a powerful piece of chest armor up for grabs. At the end of this area, you also find another Blood Rock, the item needed to +10 a weapon, putting the base count for a playthrough up to two Blood Rocks. Those super-annoying frenzy brain head creatures are down near the boss area, so do be careful. Eventually you’ll come down to a hole and a string of misshapen half-human half-fish worshippers that lead to a beach. After getting the appropriate shortcut (pull the lever, it can be kind of hard to see in the dark but there’s a convenient spot of light on it), head in to take on the Orphan of Kos.

The Orphan of Kos is relentlessly aggressive, with two stages of danger. Stage one is a traditional, incredibly fast assailant, and if you’re not careful he can pop you up in the air and kill you in mere moments – a few attacks should be all it takes. However, Orphan is also fairly vulnerable to your own combo chains. Shift around constantly and wait for an opening and he’ll give you one. Stage two is a different sort of problem as Orphan sprouts wings and is much harder to hit, but his attacks are also not as likely to chain into lethality – if you have a good blood supply, stay calm and just beat on him when the opportunity presents itself. After beating the Orphan, you get a fairly cool new weapon, and then you may wonder – where do I go now?
Back To The Beginning Of The Nightmare
Remember that skull thing we picked up at the chapel? If you didn’t grab it, do so now. There are so many chapels that this can be confusing, so it’s the chapel just up the stairs past Ludwig. Once you’ve got the skull, head back to the original location where we found the first item to trigger the surgery contraption – the area that looks like Vicar Amelia’s chamber in the nightmare. It’s just a straight shot from the original Hunter’s Nightmare checkpoint, assuming you snagged the gate shortcut. This is Laurence, he was the first one turned into a cleric beast and he’s not happy about it. While the fight begins a lot like the Cleric Beast encounter from very early in the game, it can get brutal during the second half as this fire-spewing foe leaves a trail of deadly lava in his wake. Whatever you do, do not lock on to Laurence during the second phase, as this can lead to you inadvertently burning to death in a sea of fire. Laurence is also incredibly protective of his front-facing holdings and will claw incessantly. This phase is the hardest, you have a few options. You can let Laurence crawl-circle you and wait for the tiny opening where no lava or claw is present, or (and I like this one more) is to goad Laurence into shooting fire at you at range, then closing in for a brief assault – and I do mean brief. You won’t have long. Finish up Laurence and you get a pretty neat rune. A beastly one!
I’d like to ask you to support Game Informer’s continued coverage of games with a subscription. For less than two dollars per issue, we mail you a full year of 10 print magazines, each with cover stories and preview features filled with exclusive details about the most exciting upcoming games. We profile and interview game creators. We look back on the rich history of gaming, and we celebrate what’s next.
Here on the website, we offer much of our content for free, including game reviews, daily news, videos, event coverage, and more – all with minimal ads.
We do so with a small editorial team, alongside contributing paid writers from around the world – over 65 individuals from 9 countries around the world, just in the last couple of years.
It’s not possible without support.
In a time when game makers and games coverage have faced hard struggles and layoffs, the future of this 30+ year magazine and community is at risk. Our new standalone magazine subscription is the number one way you can keep us alive – and we believe you’ll get a pretty fantastic gaming magazine in your mailbox every few weeks for your trouble.
Thank you.